There is a specific kind of magic that happens when salty, sharp Romano cheese meets a sizzling pan. This Chicken Romano Recipe captures that exact moment, delivering ultra-thin, golden-brown chicken cutlets with a crust so crisp it shatters under your fork. If you have been searching for a restaurant-quality Italian-American dinner that looks as good as it tastes, you have found it.
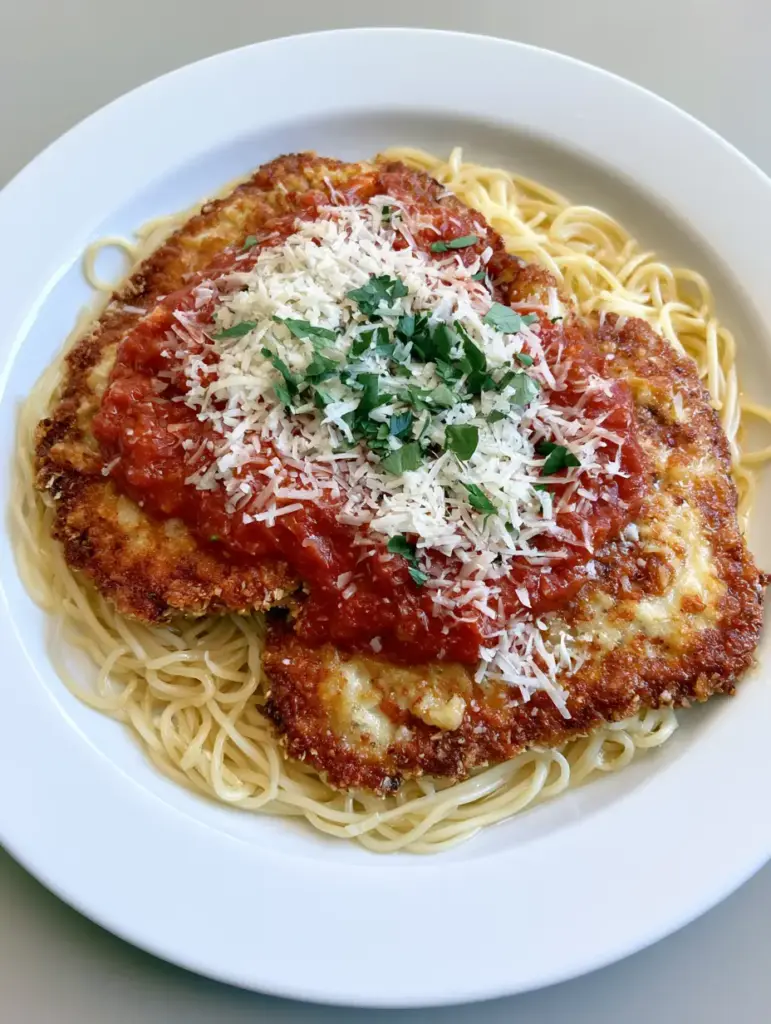
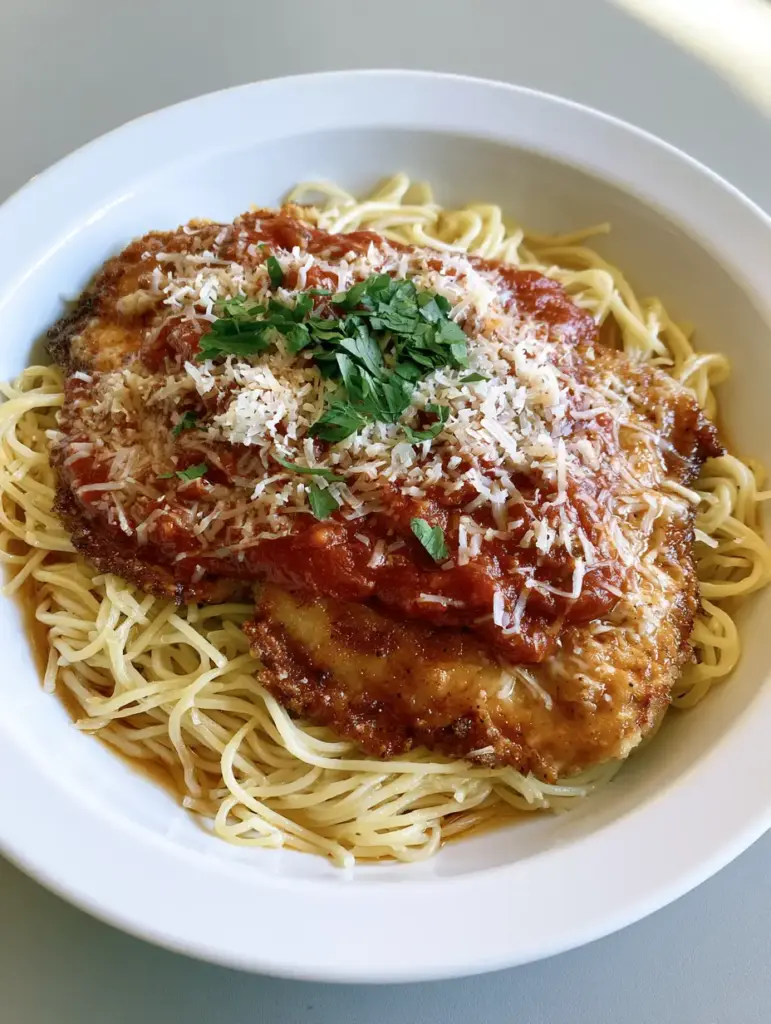
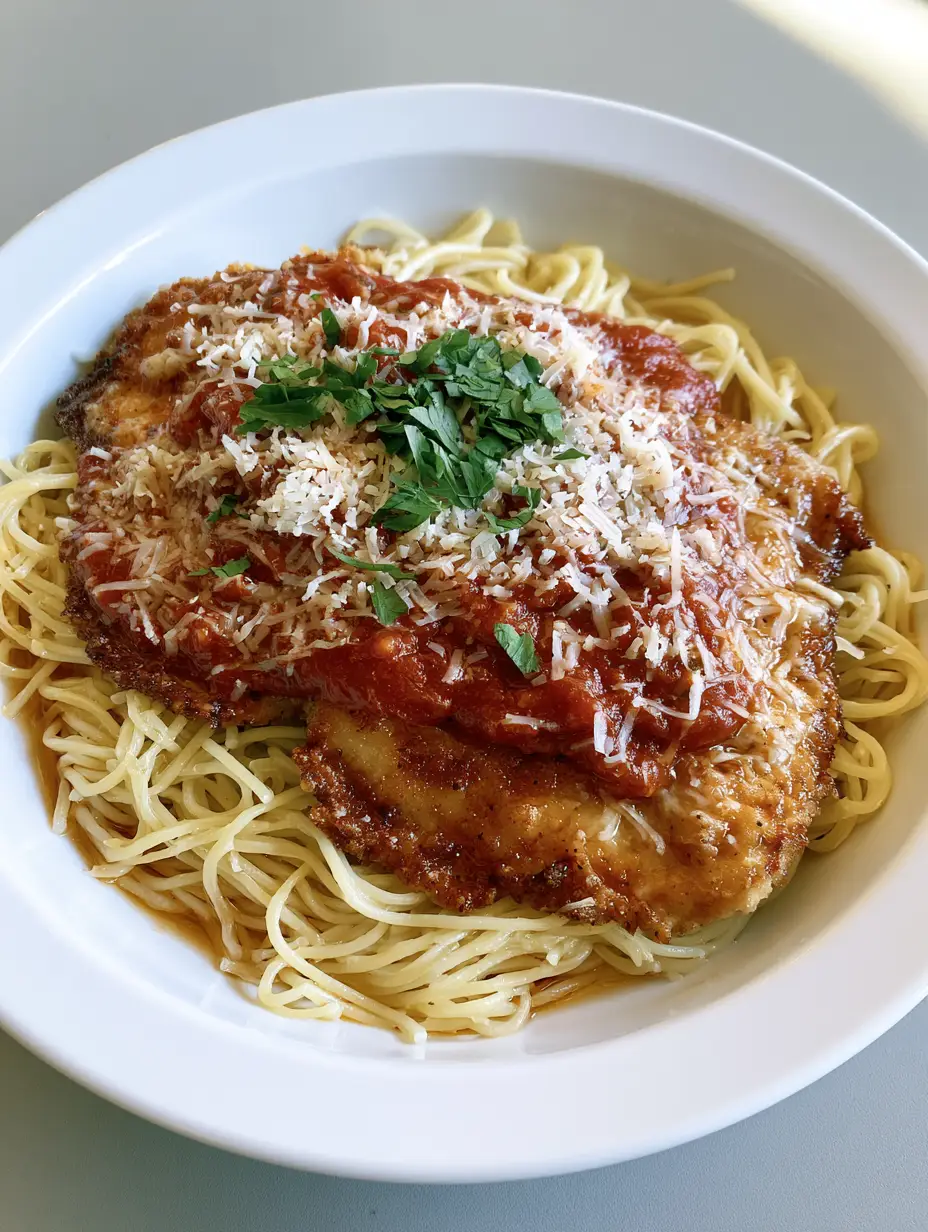
Inspired by the classic preparations found in high-end trattorias, this dish is all about the contrast of textures. Imagine a handheld smartphone photo of a perfectly plated meal: two thin, golden-brown chicken cutlets resting on a bed of glistening, oil-coated thin spaghetti, all finished with a vibrant, thick red tomato pomodoro sauce and a heavy dusting of white Romano cheese.
This recipe isn’t just about the chicken; it’s about the harmony of the “big three”—the crunch of the Romano crust, the silkiness of the pasta, and the bright acidity of the tomato sauce. Whether you are hosting a dinner party or elevating your Tuesday night, this Chicken Romano Recipe is designed to impress every single sense.
Why This Romano-Crusted Masterpiece Outshines Traditional Parmesan Chicken
- The Romano Factor: Unlike milder parmesan, Romano cheese offers a tangy, sharp punch that creates a more complex flavor profile when toasted in the pan.
- Precision Textures: By using thin spaghetti coated lightly in oil, we ensure the pasta provides a delicate foundation that doesn’t compete with the crispy cutlets.
- Visual Sophistication: The thick, vibrant red pomodoro sauce provides a stunning visual contrast against the golden-brown crust and fresh green parsley.
- Structural Integrity: Our specific dredging technique ensures the Romano-breadcrumb crust stays attached to the chicken, providing a uniform, crispy bite every time.
The Anatomy of a Perfect Chicken Romano: Essential Ingredients
Boneless Skinless Chicken Breasts: We pound these until thin to ensure rapid, even cooking and maximum surface area for that delicious Romano crust. You will need about 1.5 lbs (680g) of chicken to serve four people comfortably.
Pecorino Romano Cheese: This is the star of the show; use 1 cup (110g) of finely grated Romano for the breading and extra for the “heavy dusting” finish. Its high fat content helps create those beautiful pan-seared browning spots described in the visual blueprint.
Panko Breadcrumbs: 1 cup (60g) of Panko provides the structural “crunch” that supports the cheese, preventing the crust from becoming too greasy or soft. If you enjoy textural variety in your pasta, you might also love our Italian sausage bow-tie pasta (coming soon).
Thin Spaghetti: 1 lb (454g) of thin spaghetti or spaghettini provides the “al dente” base that absorbs just enough oil to glisten without becoming heavy. The thinness of the noodle mirrors the thinness of the chicken cutlets for a cohesive mouthfeel.
Thick Tomato Pomodoro Sauce: 2 cups (480ml) of a high-quality, thick red sauce is essential. We look for a “vibrant red” hue and a consistency thick enough to be “ladled across the center” without running all over the plate.
Extra Virgin Olive Oil: You will need 4 tbsp (60ml) for searing the chicken and an additional 1 tbsp (15ml) to coat the pasta. The oil ensures the spaghetti doesn’t stick and gives it that professional, glossy look.
Fresh Flat-Leaf Parsley: 2 tbsp (8g) of finely chopped parsley provides the essential green “sprinkle” that breaks up the warm tones of the dish. Freshness is key here for both color and a clean, peppery finish.
Foundational Seasonings: 1 tsp (6g) of kosher salt, 1/2 tsp (1g) of black pepper, and 1/2 cup (64g) of all-purpose flour for the initial dredge. These “invisible” ingredients ensure the chicken is seasoned from the inside out and the crust adheres perfectly.
Must-Have Tools for the Professional Home Cook
To achieve the specific “pan-seared browning” and “al dente” pasta texture, a few tools are non-negotiable. A heavy-bottomed stainless steel or cast-iron skillet is superior for heat retention, which is how we get that deep golden-brown crust.
You will also need a meat mallet for pounding the chicken cutlets to a uniform thickness of about 1/4 inch (0.6cm). A wide, shallow dredging station (three separate bowls) makes the flour-egg-breadcrumb process clean and efficient. Finally, a pair of silicone-tipped tongs will allow you to flip the delicate cutlets without tearing the Romano crust.
Developing the Crust: A Step-by-Step Culinary Guide
Preparing the Chicken Foundation
Start by slicing your chicken breasts horizontally to create thin cutlets. Place them between two sheets of plastic wrap and use the flat side of a meat mallet to pound them to an even 1/4-inch thickness. This step is critical; uniform thickness ensures the chicken is cooked through at the exact moment the Romano cheese reaches peak crispiness.
The Triple-Dredge Technique
Set up three shallow bowls. The first contains the flour seasoned with salt and pepper. The second contains two beaten eggs with a splash of water. The third holds the mixture of finely grated Romano cheese and Panko breadcrumbs. This sequence—dry, wet, dry—is the scientific secret to a crust that never slides off.
Achieving the Golden-Brown Pan Sear
Heat 3 tbsp (45ml) of olive oil in your skillet over medium-high heat. Once the oil shimmers, add the chicken cutlets, being careful not to overcrowd the pan. Sear for 3-4 minutes per side. You are looking for a “visible, crispy Romano cheese and breadcrumb crust showing slight pan-seared browning,” as described in our visual guide. The smell of toasted cheese will tell you when you are close.
Perfecting the Al Dente Spaghetti
While the chicken rests, boil the thin spaghetti in heavily salted water. Drain the pasta while it still has a slight bite (al dente). Immediately toss it with 1 tbsp (15ml) of olive oil. This creates the “lightly coated in oil” foundation that prevents the noodles from clumping on the plate. For a different take on chicken and pasta, check out our spicy garlic butter chicken tortellini.
Assembling the Visual Masterpiece
Place a generous bed of the oiled spaghetti on a plain white round ceramic plate. Carefully rest two golden chicken cutlets on top. Use a ladle to spoon the thick red tomato pomodoro sauce right across the center of the chicken. Finish with a “heavy dusting” of finely grated Romano and a vibrant sprinkle of chopped parsley.
Expert Secrets for the Ultimate Chicken Romano Recipe
- Cold Cheese is Key: Use cold, finely grated Romano cheese. If the cheese is too warm, it can clump in the breading bowl rather than adhering to the chicken.
- Don’t Fiddle with the Flip: Once the chicken hits the hot oil, let it sit undisturbed for at least 3 minutes. Moving it too early will break the delicate bond between the cheese and the meat.
- The Sauce Temperature: Ensure your pomodoro sauce is thick and hot. A watery sauce will soak into the crispy crust, ruining that “crunch” we worked so hard to achieve.
- Resting Period: Let the chicken rest for 2 minutes on a wire rack after frying. This allows the juices to redistribute without the bottom of the cutlet becoming soggy from its own steam.
Serving Suggestions and Perfect Pairings
This Chicken Romano Recipe is a complete meal on its own, but it pairs beautifully with light, crisp sides. A simple arugula salad with lemon vinaigrette cuts through the richness of the Romano cheese perfectly. If you are looking for more Italian-inspired comfort, our high protein Italian pasta salad is a fantastic make-ahead option for the following day.
For those who love a bit of heat, consider serving this with a side of smoky red chimichurri sauce for a non-traditional but delicious fusion twist. And if you have leftover chicken, it makes an incredible base for a chicken torta sandwich (coming soon) the next afternoon!
Practical Advice for Storage and Reheating
Storage: Store the chicken and pasta in separate airtight containers in the refrigerator for up to 3 days. Keeping them separate prevents the pasta from drawing moisture out of the chicken’s crust.
Reheating: To maintain the “crispy Romano” texture, reheat the chicken in an air fryer at 350°F (175°C) for 3-5 minutes or in a toaster oven. Avoid the microwave, as it will make the breading rubbery. The pasta can be quickly tossed in a hot pan with a teaspoon of water to loosen the noodles.
Chicken Romano Recipe Frequently Asked Questions
Yes, but Pecorino Romano is saltier and tangier, which provides the signature flavor. If using Parmesan, you may need to add a pinch of extra salt to the breading mixture.
Ensure the chicken is patted dry before the flour dredge, and let the breaded chicken rest for 5 minutes before frying to help the crust set.
Absolutely. Pounding the chicken ensures it cooks fast enough that the cheese-based crust doesn’t burn before the meat is safely cooked through.
Use an air fryer or oven at 350°F (175°C) to restore the crispiness. Microwaving is not recommended as it will make the Romano crust soggy.
Thin spaghetti (or spaghettini) has a more delicate texture that matches the thin-pounded chicken cutlets, creating a more balanced and elegant bite.
The Final Plate: Your Chicken Romano Recipe Card
Chicken Romano Recipe: The Ultimate Crispy Romano-Crusted Chicken with Pomodoro
Ingredients
Equipment
Method
- Place chicken cutlets between plastic wrap and pound to 1/4-inch thickness using a meat mallet.
- Prepare three bowls: flour in the first; beaten eggs in the second; Romano cheese and Panko in the third.
- Dredge each cutlet in flour, dip in egg wash, then coat thoroughly in the Romano-Panko mixture, pressing to adhere.
- Heat 4 tbsp oil in a skillet over medium-high. Fry chicken for 3-4 minutes per side until deep golden-brown and crispy.
- Boil spaghetti until al dente, drain, and toss with 1 tbsp olive oil to coat lightly.
- Place chicken on a bed of spaghetti. Ladle thick pomodoro sauce over the center. Top with remaining Romano and chopped parsley.
Notes
Use cold, freshly grated Romano for the best crust structure.
Bring the Italian Steakhouse Experience Home
Crafting the perfect Chicken Romano Recipe is about embracing the details—the thinness of the cutlet, the sharpness of the cheese, and the vibrant red of the sauce. This dish proves that with the right technique, home-cooked meals can easily rival the most photogenic restaurant plates. We invite you to share your results and tag us on social media!
Did you achieve that perfect golden-brown crust? Let us know in the comments below! Don’t forget to follow us on Pinterest for more culinary inspiration and visual recipe guides. Happy cooking!