Imagine walking through your front door after a long day to the intoxicating aroma of ginger, garlic, and caramelized pineapple. Sweet Hawaiian Crockpot Chicken is not just a meal; it is a sensory experience that brings the vibrant flavors of the islands directly to your kitchen table with minimal effort.
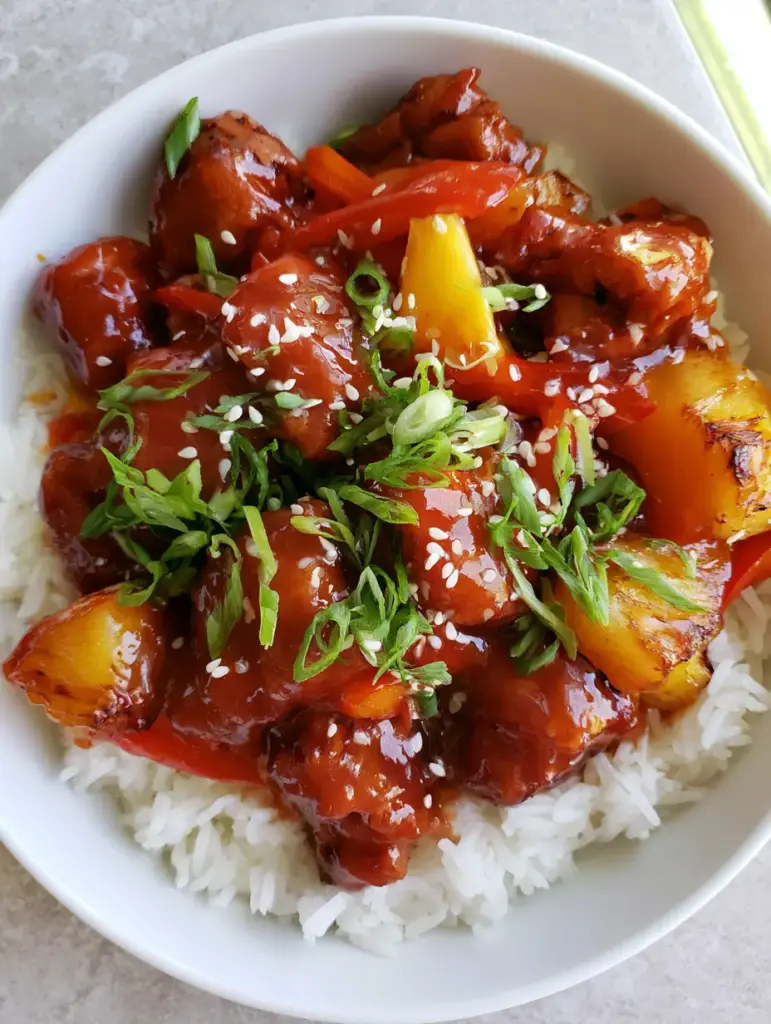
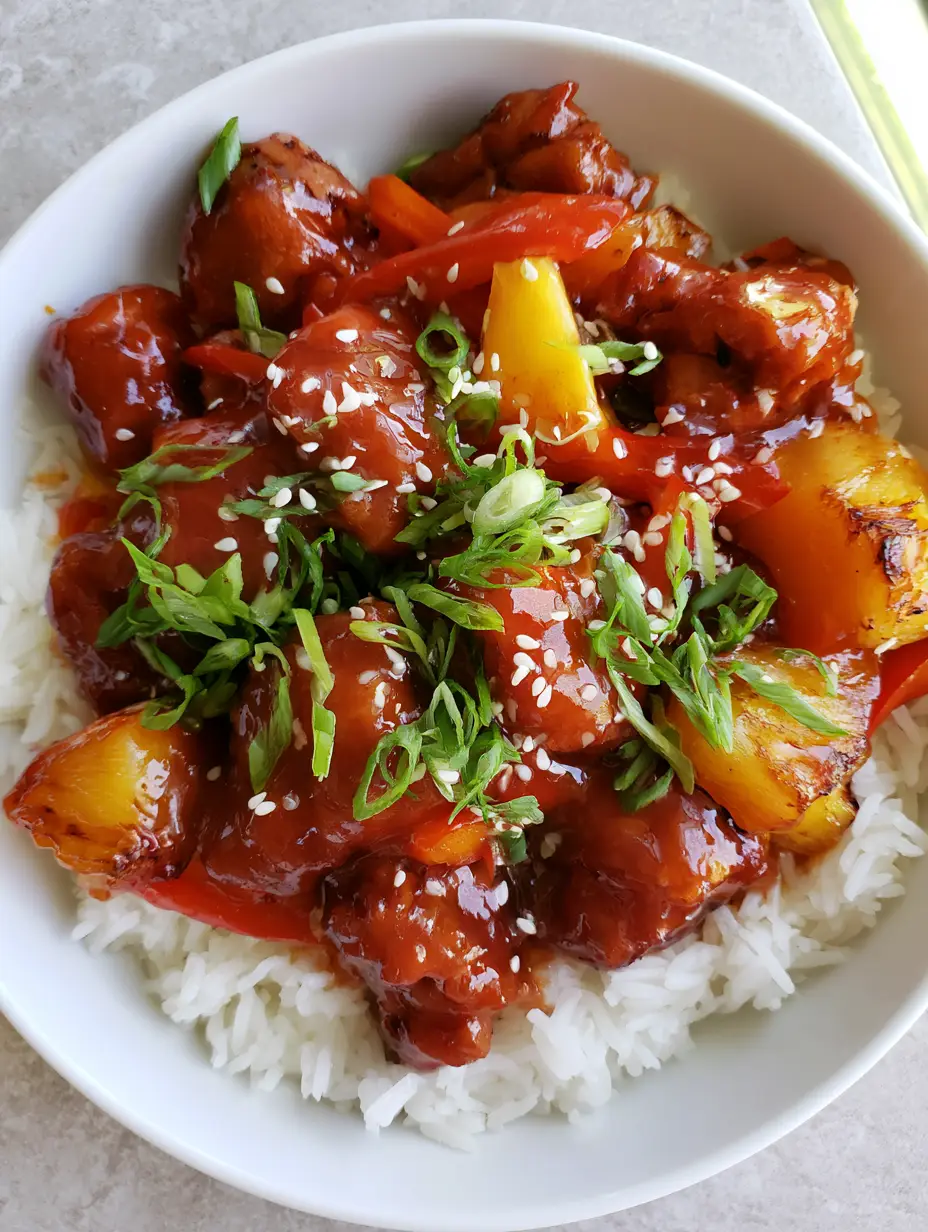
This recipe is meticulously crafted to deliver that specific, restaurant-quality aesthetic you see in professional food photography. We are talking about tender, bite-sized chicken chunks enveloped in a thick, translucent, reddish-brown glaze that catches the light beautifully against a bed of fluffy rice.
Whether you are feeding a hungry family or meal-prepping for a busy week, this Sweet Hawaiian Crockpot Chicken provides the perfect balance of sweet and savory. The addition of softened red bell peppers and toasted sesame seeds ensures every bite has the textural variety that makes a dish truly memorable.
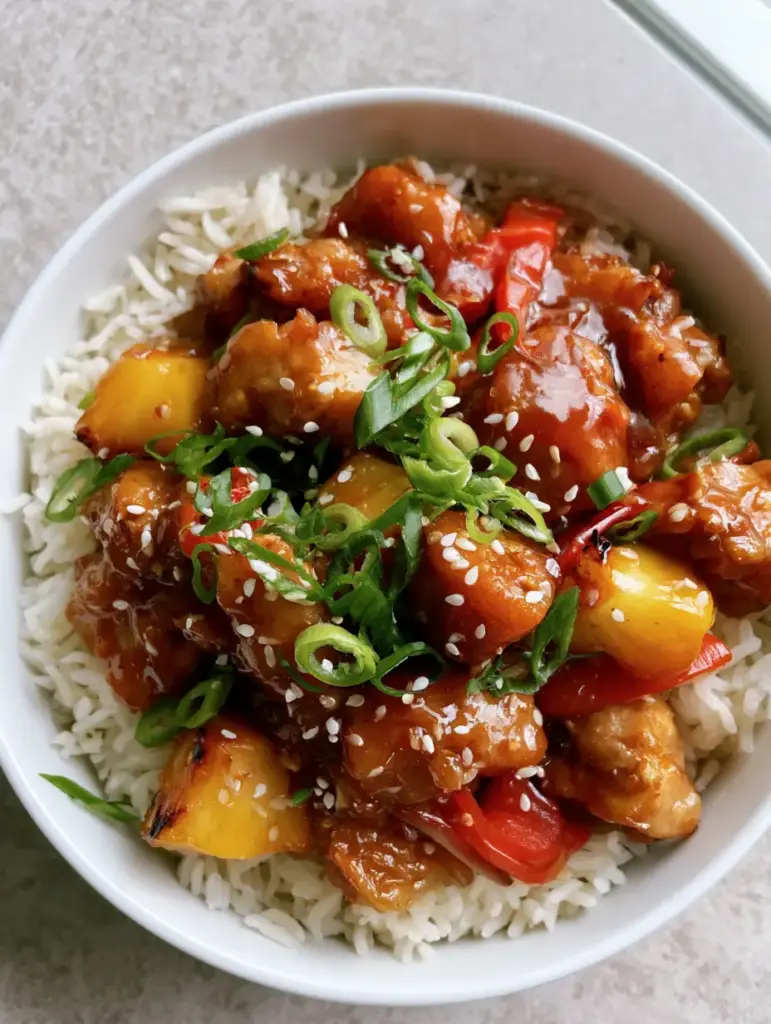
Visual and Sensory Highlights of This Tropical Masterpiece
- The Signature Glossy Glaze: A thick, translucent coating with a deep reddish-brown hue that clings perfectly to every piece of chicken.
- Tenderized Textures: Succulent chicken chunks that give way at the touch of a fork, paired with red bell peppers that have softened but retained their vibrant color.
- Golden Pineapple Accents: Sweet pineapple tidbits featuring slightly browned edges, offering a concentrated burst of tropical acidity.
- Aromatic Garnishes: A generous double-hit of freshness from thinly sliced green scallions and the nutty crunch of toasted white sesame seeds.
Essential Elements for Your Tropical Slow Cooker Feast
Creating the perfect Sweet Hawaiian Crockpot Chicken requires a balance of pantry staples and fresh produce to achieve that iconic flavor profile. Each ingredient serves a specific culinary purpose to ensure the final dish matches our visual blueprint.
Boneless Skinless Chicken Thighs or Breasts: 2 lbs (907g). Thighs offer more moisture for long slow cooking, while breasts provide a leaner, uniform bite-sized chunk.
Canned Pineapple Tidbits (with juice): 20 oz (567g). The juice provides the acidic base for our glaze, while the tidbits offer that essential “slightly browned” visual element.
Red Bell Peppers: 2 large peppers. Sliced into thin strips, these provide a pop of color and a mild sweetness that complements the pineapple.
Low-Sodium Soy Sauce: 1/2 cup (120ml). This provides the savory umami depth and contributes to the rich, dark color of the final glaze.
Light Brown Sugar: 1/2 cup (100g). The molasses in the sugar helps create the sticky, glossy texture and balances the acidity of the fruit.
Rice Vinegar: 2 tbsp (30ml). A touch of vinegar cuts through the sweetness, brightening the overall flavor profile of the chicken.
Fresh Ginger: 1 tbsp (15g). Freshly grated ginger provides a subtle heat and a fragrance that bottled versions simply cannot match.
Garlic Cloves: 4 cloves. Minced finely to ensure the flavor is evenly distributed throughout the slow-cooking process.
Ketchup: 1/4 cup (60ml). This is the secret “forensic” ingredient that helps achieve that specific reddish-brown translucent glow described in the visual prompt.
Cornstarch: 3 tbsp (24g). Essential for the “slurry” that transforms thin cooking liquid into a thick, restaurant-style glaze.
Long-Grain White Rice: 2 cups (370g) dry. This serves as the fluffy foundation that soaks up the extra sauce.
Sesame Oil: 1 tsp (5ml). A foundational invisible ingredient that adds an aromatic toasted base to the sauce.
Garnishings: 3 scallions and 1 tbsp (9g) toasted white sesame seeds. These are non-negotiable for the final visual presentation.
Must-Have Culinary Tools for Hawaiian Chicken
To achieve the professional results shown in our imagery, you will need a few specific tools. A 6-quart (5.7L) slow cooker is ideal for ensuring even heat distribution without overcrowding the chicken.
You will also need a small whisk and mixing bowl to create the cornstarch slurry, which prevents clumps in your final sauce. For the rice, a dedicated rice cooker or a heavy-bottomed pot with a tight-fitting lid will ensure those “fluffy long grains” are perfectly steamed.
Finally, a sharp chef’s knife is crucial for slicing the red bell peppers into uniform strips and finely dicing the scallions. Precision cutting leads to a more professional, “handheld smartphone photo” aesthetic that looks effortless yet refined.
Mastering the Slow Cooker Technique (Step-by-Step)
Preparing the Flavor Foundation
Begin by patting your chicken dry with paper towels; this helps the sauce adhere better later on. Cut the chicken into uniform 1-inch (2.5cm) bite-sized chunks to ensure they cook evenly and match the visual blueprint.
In a medium mixing bowl, whisk together the pineapple juice (reserved from the can), soy sauce, brown sugar, ketchup, rice vinegar, minced garlic, grated ginger, and sesame oil. This slurry of ingredients will eventually become that glossy reddish-brown glaze.
The Slow Cooking Process
Place the chicken chunks and the sliced red bell pepper strips into the crockpot. Pour the liquid mixture over the top, ensuring every piece of chicken is submerged or well-coated.
Cover and cook on LOW for 4 to 5 hours or on HIGH for 2 to 3 hours. You are looking for the chicken to be tender enough to break with a spoon, but not so overcooked that it turns into shredded meat.
Achieving the Signature Glossy Glaze
About 30 minutes before serving, whisk your cornstarch with 3 tbsp (45ml) of cold water to create a slurry. Stir this into the crockpot along with the pineapple tidbits.
Turn the slow cooker to HIGH if it wasn’t already. The sauce will begin to bubble slightly around the edges; watch as it transforms from a thin liquid into a thick, translucent, glossy glaze that coats the back of a spoon.
The Final Presentation Construction
While the sauce thickens, steam your long-grain white rice until it is light and fluffy. Scoop a generous bed of rice into a white ceramic bowl, creating a stable foundation for the chicken.
Ladle the chicken, peppers, and pineapple over the rice, ensuring you include plenty of that reddish-brown glaze. Finish with a heavy sprinkle of white sesame seeds and a handful of thinly sliced green scallions for that professional, top-down visual appeal.
Professional Secrets for a Flawless Finish
- Searing for Color: If you have extra time, sear the pineapple tidbits in a hot pan for 2 minutes before adding them to the crockpot to achieve those “slightly browned edges.”
- Slurry Science: Always mix cornstarch with cold liquid first; adding it directly to the hot crockpot will result in gummy white lumps instead of a clear glaze.
- Don’t Overcook the Peppers: If you prefer your red bell peppers to have a bit of “snap,” add them during the last hour of cooking rather than at the beginning.
- Rice Texture: Rinse your long-grain rice under cold water until the water runs clear to remove excess starch, ensuring the grains stay separate and fluffy.
How to Store and Reheat Your Aloha Leftovers
Sweet Hawaiian Crockpot Chicken actually tastes even better the next day as the ginger and garlic flavors continue to meld. Store leftovers in an airtight container in the refrigerator for up to 4 days.
When reheating, add a splash of water or pineapple juice to the dish before microwaving. This loosens the glaze, which naturally thickens further when cold, returning it to its original glossy state.
You can also freeze this recipe for up to 3 months. For best results, freeze the chicken and sauce separately from the rice to maintain the best texture upon thawing.
Perfect Pairings for a Complete Meal
While this dish is a complete meal on its own, you can elevate the experience by serving it alongside other tropical-inspired sides. A crisp Thai Chickpea Salad provides a refreshing, crunchy contrast to the soft chicken and rice.
If you are hosting a larger gathering, consider adding some Grilled Shrimp Tacos (coming soon) to the menu for a full “surf and turf” island theme. For those who enjoy a bit of heat, a side of Air Fryer Dill Pickle Chicken offers a tangy zing that cleanses the palate between sweet bites.
If you prefer a different vessel for these flavors, you can easily adapt these ingredients into a Hawaiian Chicken Bowl for an easy on-the-go lunch option.
Frequently Asked Questions
Yes! Pressure cook the chicken and sauce for 8-10 minutes, then use the ‘Sauté’ function to stir in the cornstarch slurry and pineapple until the sauce thickens and becomes glossy.
It is not recommended to put frozen chicken directly into a slow cooker as it stays in the ‘danger zone’ for bacterial growth too long. Thaw the chicken completely in the refrigerator before starting.
The secret is the cornstarch slurry. Always mix cornstarch with cold water before adding it to the crockpot, and ensure the cooker is on the ‘High’ setting for at least 20-30 minutes to activate the thickening properties.
A long-grain white rice like Jasmine is ideal because it remains fluffy and individual, providing a clean base that doesn’t become mushy when topped with the heavy glaze.
The Ultimate Sweet Hawaiian Crockpot Chicken Recipe Card
Sweet Hawaiian Crockpot Chicken: The Ultimate Glossy Tropical Dinner
Ingredients
Equipment
Method
- Cut chicken into 1-inch (2.5cm) chunks and place in the slow cooker with red bell pepper strips.
- In a bowl, combine pineapple juice, soy sauce, brown sugar, ketchup, vinegar, ginger, and garlic. Pour over chicken.
- Cover and cook on LOW for 4-5 hours until chicken is tender.
- Mix cornstarch with 3 tbsp cold water. Stir into the crockpot with pineapple tidbits. Cook on HIGH for 20-30 minutes until glossy and thick.
- Serve over steamed white rice. Garnish with scallions and sesame seeds.
Notes
Sear the pineapple tidbits in a pan before adding for a charred visual effect.
Bring the Taste of the Islands Home
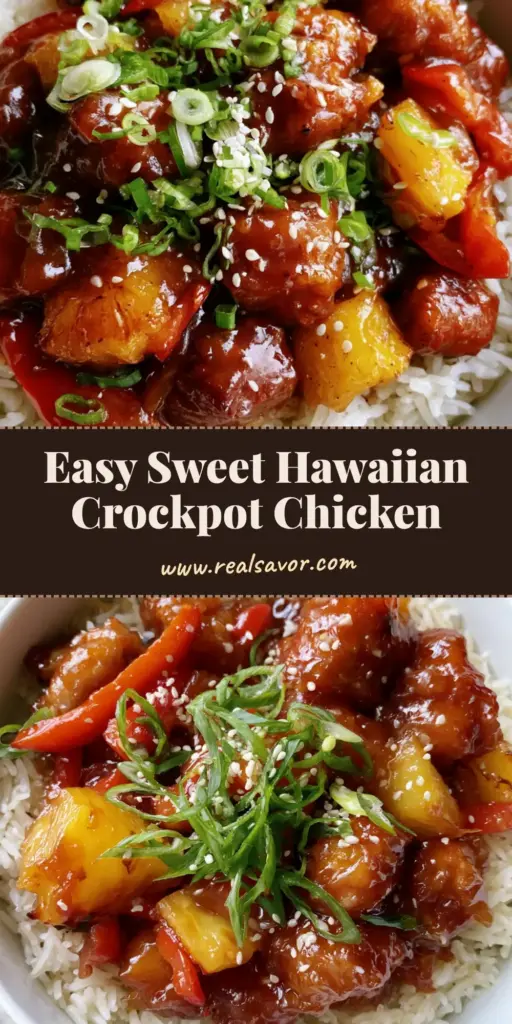
This Sweet Hawaiian Crockpot Chicken is the perfect solution for those nights when you want a meal that looks and tastes like it came from a high-end bistro but requires minimal effort. The combination of the glossy reddish-brown glaze, the sweetness of the pineapple, and the savory chicken is truly unbeatable.
If you enjoyed this recipe, please leave a comment below and let us know how your glossy glaze turned out! Don’t forget to follow us on Pinterest for more visually stunning and delicious meal ideas.