There is a common misconception in the culinary world that turkey burgers are destined to be the dry, flavorless cousins of the beef patty. This Juicy Turkey Burger Recipe is here to dismantle that myth entirely.
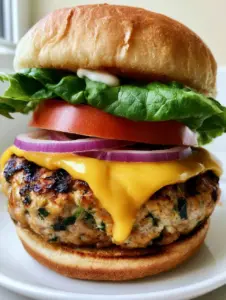
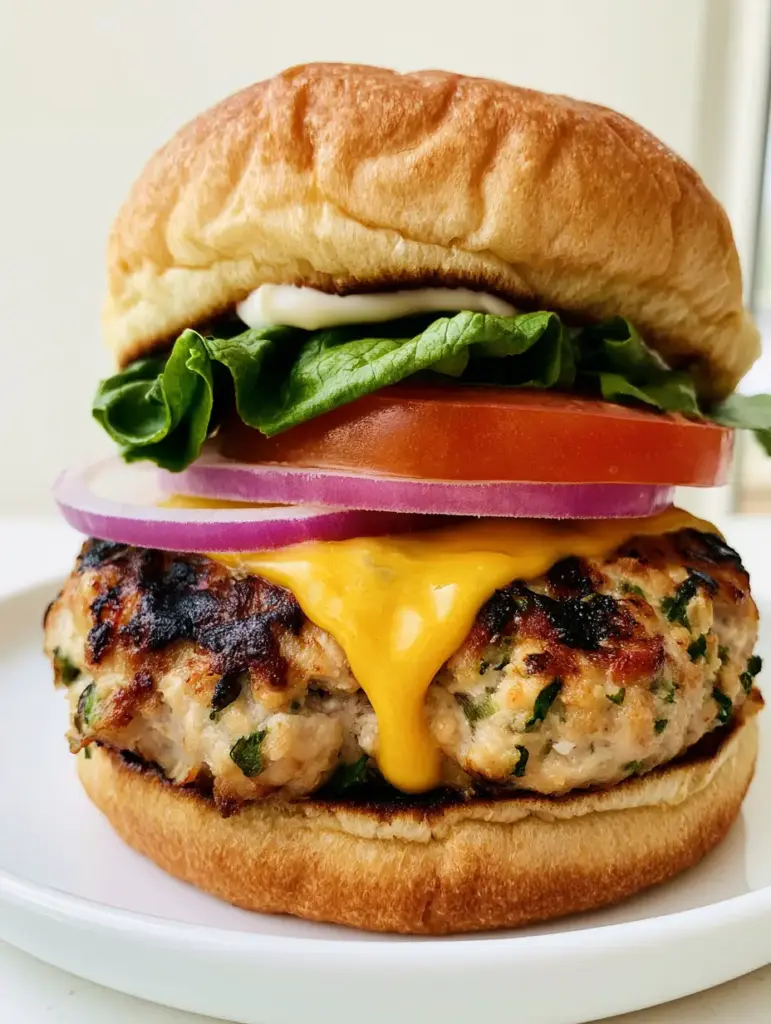
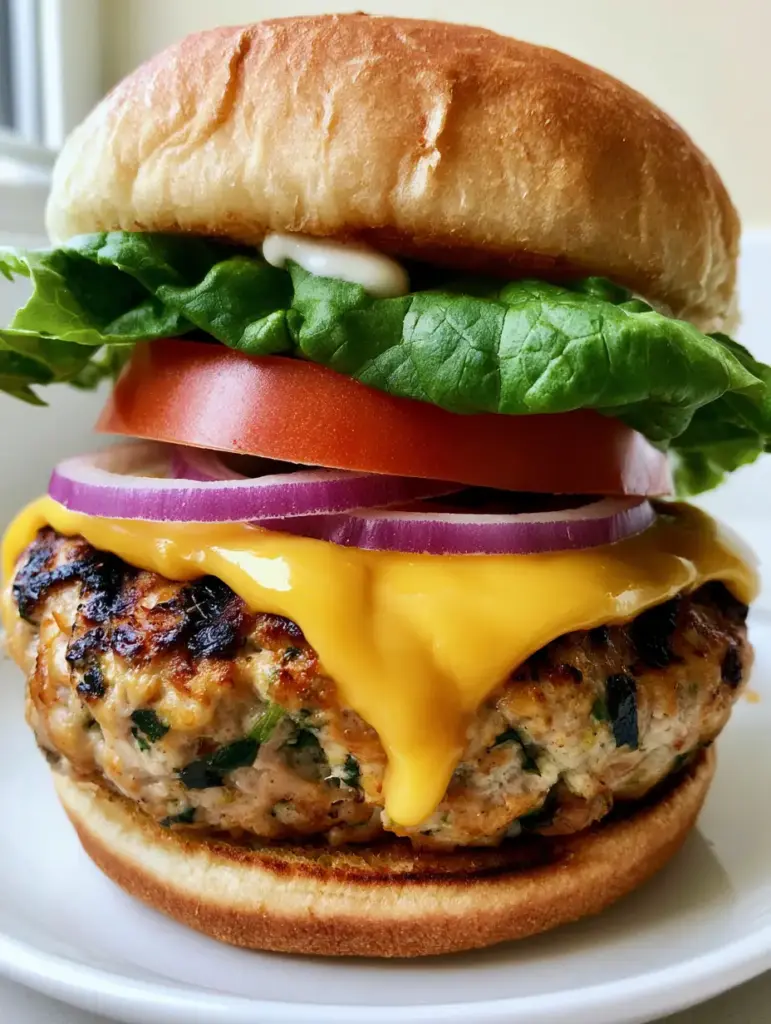
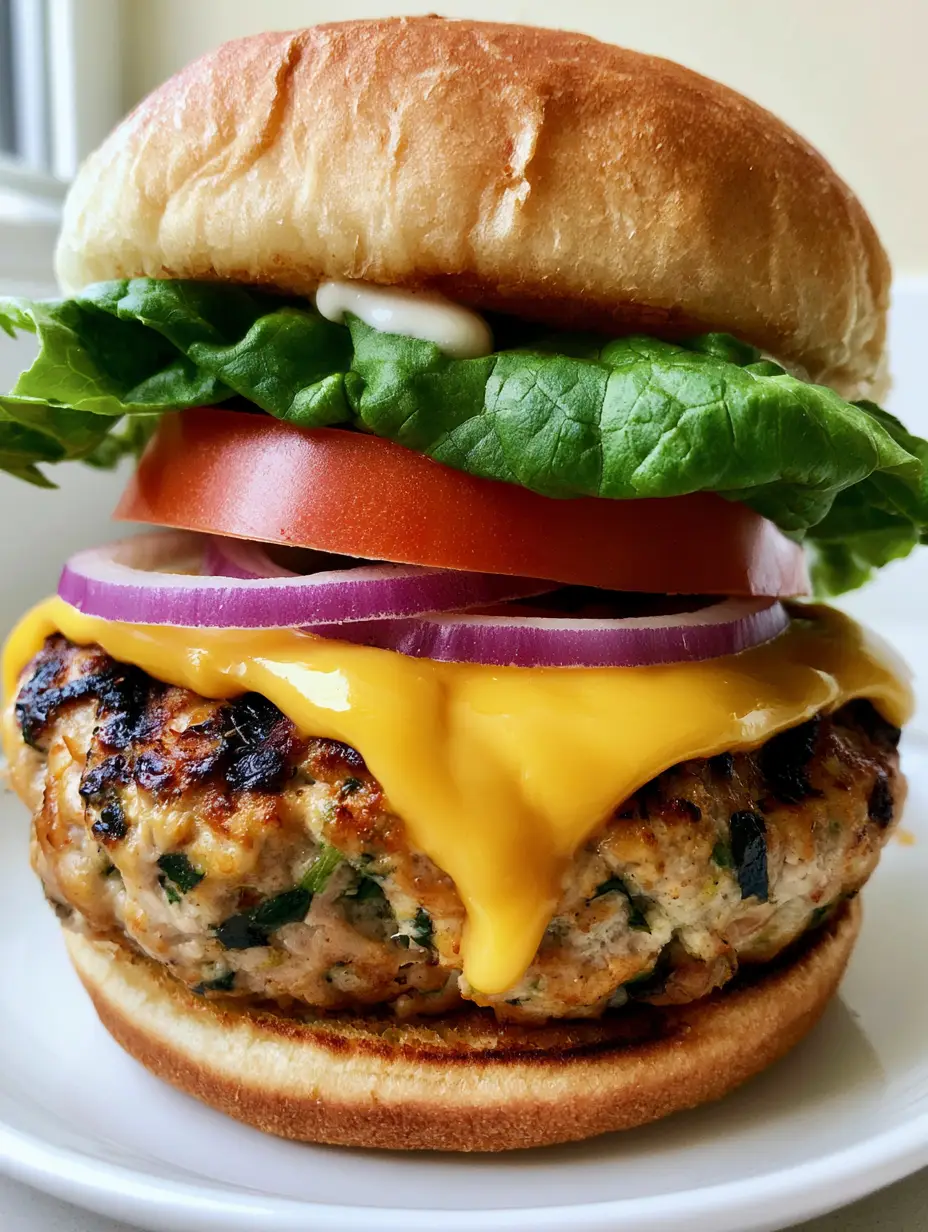
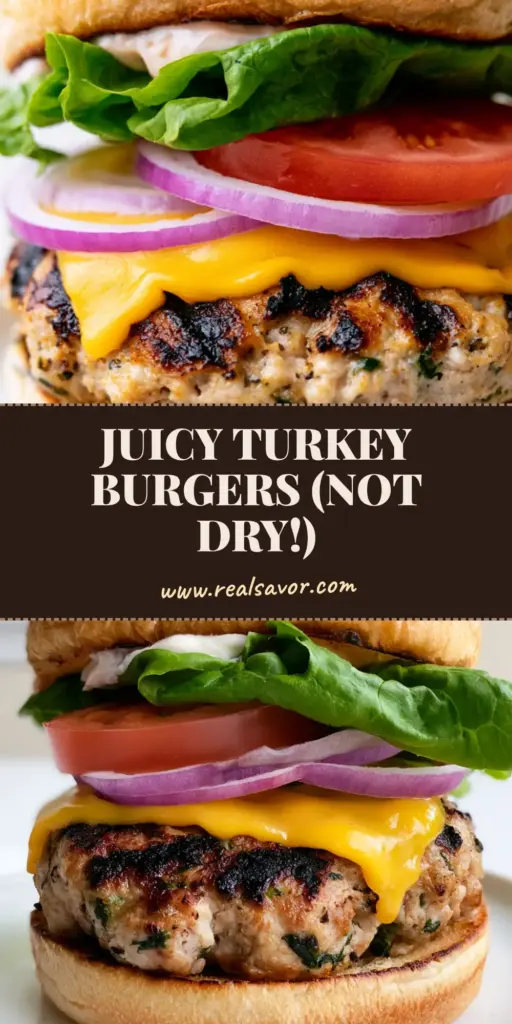
Imagine a thick, hand-pressed patty with deep, dark seared grill marks and vibrant flecks of fresh green herbs throughout. Visualize a slice of sharp yellow cheddar cheese with soft, drooping edges melting perfectly over the edges of that succulent meat.
Every bite of this burger offers a symphony of textures, from the crunch of thin red onion rings to the refreshing snap of a folded butter lettuce leaf and the sweetness of a ruby red tomato slice. All of this is housed within a golden-brown, lightly toasted brioche bun with a hint of creamy mayonnaise peeking through.
By focusing on culinary science and moisture-retaining techniques, we have developed a burger that rivals any classic smash burger in terms of satisfaction and flavor depth. This is not just a healthy alternative; it is a gourmet experience in its own right.
Why This Juicy Turkey Burger Recipe Outshines the Rest
- Unmatched Texture: The hand-pressed patties ensure a tender “mouthfeel” that avoids the rubbery texture often found in store-bought frozen options.
- Visual Perfection: We utilize high-heat searing to achieve those professional dark grill marks that contrast beautifully with the bright green herbs.
- Structural Integrity: The toasted brioche bun provides a sturdy yet pillowy foundation that won’t disintegrate under the juices of the tomato and turkey.
- Symphonic Toppings: Every layer, from the melted cheddar to the creamy mayo, is chosen to balance the lean profile of the turkey meat.
The Foundation: Essential Ingredients for the Ultimate Turkey Patty
Ground Turkey (93% Lean): Use 1 lb (450g) of lean ground turkey; the 7% fat content is the “sweet spot” that ensures juiciness without excessive grease. Avoid 99% fat-free ground turkey breast, as it lacks the lipids necessary for a proper sear.
Fresh Parsley and Oregano: You will need 2 tbsp (8g) of finely chopped fresh herbs to create those signature green flecks visible in the patty. These herbs provide an earthy counterpoint to the rich cheddar cheese.
Kosher Salt and Cracked Black Pepper: Seasoning the exterior of the patty just before it hits the heat is vital for crust formation. Use 1 tsp (6g) of salt to ensure the proteins bond correctly during the sear.
Olive Oil or Avocado Oil: A high-smoke point oil (1 tbsp / 15ml) is the “invisible” hero that prevents sticking and facilitates the dark, seared grill marks. Never place a cold turkey patty onto a dry pan.
Sharp Yellow Cheddar Cheese: Four thick slices (approx. 28g each) provide the “drooping edges” and creamy saltiness required for a gourmet finish. The bold color of yellow cheddar offers a striking visual against the white ceramic plate.
Brioche Buns: These high-egg-content buns provide the golden-brown hue and sweetness that complements the savory turkey. If you are feeling adventurous with your baking, you might even find these similar to the dough used for homemade hot dog buns.
The Garden Toppings: One large ruby red tomato, a small red onion, and a head of butter lettuce provide the essential crunch. Thinly slicing the onion into rings ensures every bite has a sharp bite without overpowering the meat.
Creamy Mayonnaise: A simple dollop (1 tbsp / 15g per burger) on the top bun acts as a moisture barrier and adds a rich, velvety finish to the palate.
Professional Equipment for a Steakhouse-Quality Burger
To achieve the “unedited smartphone photo” look of a gourmet burger, your equipment must facilitate high heat and even distribution. A heavy-bottomed cast iron skillet or a ridged grill pan is non-negotiable for those dark seared marks.
You will also need a sharp chef’s knife for slicing the red onion into those perfect “thin rings” described in the visual blueprint. A wide metal spatula is essential for flipping the turkey without breaking the delicate herb-flecked structure.
Finally, a small basting cover or a simple metal bowl can be used to trap steam during the final minute of cooking. This is the professional secret to achieving those “soft, drooping edges” on the melted cheddar cheese.
Mastering the Sear: Step-by-Step Culinary Instructions
Phase 1: Preparing the Herb-Infused Turkey Base
In a chilled stainless steel bowl, combine your ground turkey with the chopped parsley and oregano. Use your hands to gently fold the herbs into the meat; overworking the turkey will result in a dense, tough burger.
Divide the mixture into four equal portions (approx. 4 oz / 115g each) and press them into flat discs. Make a slight indentation in the center of each patty with your thumb to prevent the burger from “doming” during the cooking process.
Phase 2: Achieving the Perfect Golden Brioche Toast
Split your brioche buns and lightly butter the cut sides. Place them cut-side down on a medium-heat skillet for 60-90 seconds until they are “lightly toasted and golden-brown.”
Remove the buns immediately and set them aside. Toasting the bun creates a structural “seal” that prevents the creamy mayonnaise from soaking into the bread and making it soggy.
Phase 3: Searing for Dark Grill Marks and Juiciness
Wipe your skillet and increase the heat to medium-high. Add your oil and wait for it to shimmer—this is the sensory cue that the pan is ready for a professional sear.
Place the turkey patties in the pan. Do not move them for at least 4 minutes; this allows the Maillard reaction to create those “dark seared grill marks.” Flip only once.
Phase 4: The Art of the Melted Cheddar
Once flipped, cook the turkey for another 3 minutes. Place a slice of yellow cheddar on each patty. Add a teaspoon of water to the pan and immediately cover with a lid for 30 seconds.
The steam will instantly melt the cheese, creating those “soft, drooping edges” that hug the patty. Check for an internal temperature of 165°F (74°C) using a meat thermometer to ensure safety and maximum juiciness.
Phase 5: The Gourmet Assembly Strategy
Start with the toasted bottom bun as your foundation. Place the seared patty with melted cheese directly onto the bread. This allows any residual juices to season the bun.
Layer on two thin rings of crisp red onion, followed by a folded leaf of bright green butter lettuce. Top with a thick, juicy slice of ruby red tomato. Spread a dollop of mayonnaise on the top bun crown and press it gently onto the assembly.
Expert Tips for Turkey Burger Success
- Keep the Meat Cold: Always keep your ground turkey in the refrigerator until the very moment you are ready to form the patties. Fat melts at room temperature, and you want that fat to stay in the meat until it hits the hot pan.
- Don’t Press the Patty: Once the meat is in the pan, resist the urge to press down with your spatula. Pressing squeezes out the moisture you’ve worked so hard to preserve.
- The Dimple Trick: Turkey tends to shrink more than beef. Creating a larger diameter patty than the bun ensures that after the sear, the meat still covers the entire bread surface.
- Visual Cues: Look for the “beading” of juices on the top of the raw side of the patty; this is the signal that it is time to flip.
Storage, Reheating, and Meal Prep
If you have leftover turkey patties, they can be stored in an airtight container in the refrigerator for up to 3 days. To maintain the “juicy” quality of this Juicy Turkey Burger Recipe, reheat the patties in a skillet over low heat with a splash of water, rather than using a microwave.
You can also freeze the raw, herb-flecked patties. Place parchment paper between each patty and store in a vacuum-sealed bag for up to 3 months. Thaw completely in the refrigerator before searing to ensure the interior reaches 165°F (74°C).
What to Serve With Your Gourmet Burger
A burger this visually stunning deserves a side dish that complements its fresh herb profile. For a light lunch, consider pairing this with a Mediterranean pasta salad featuring feta and olives.
If you are serving these during a summer cookout, a bowl of street corn salad provides a smoky, creamy contrast to the lean turkey. For those who enjoy a bit of heat, a side of smoky red chimichurri sauce makes an excellent dipping sauce for the burger itself.
Frequently Asked Questions
Yes! Ensure your grill grates are well-oiled. However, a cast iron skillet is often better for achieving the specific dark, even seared marks shown in gourmet photos.
This recipe focuses on the natural texture of the meat. If handled gently and chilled properly, the patties will hold their shape perfectly without the need for fillers like breadcrumbs.
Place the cheese on the patty during the last minute of cooking, add a teaspoon of water to the pan, and cover it with a lid. The steam will create that ‘drooping’ effect.
For safety and maximum juiciness, ground turkey must reach an internal temperature of 165°F (74°C). Use a meat thermometer to avoid overcooking.
Turkey is leaner than beef, so it dries out faster. To prevent this, use 93% lean meat, avoid over-mixing, and use a steam-melting technique for the cheese to lock in moisture.
The Ultimate Juicy Turkey Burger Recipe
Juicy Turkey Burger Recipe: The Secret to a Perfectly Seared Gourmet Burger
Ingredients
Equipment
Method
- Gently fold the ground turkey with chopped parsley and oregano in a chilled bowl.
- Shape into four 4oz discs with a thumb indentation in the center.
- Place buttered brioche buns on a skillet until golden-brown and set aside.
- Heat oil in a skillet and cook patties for 4-5 minutes per side until dark grill marks form.
- Add cheddar slices and a splash of water, then cover for 30 seconds to achieve drooping edges.
- On the bottom bun, layer the patty, onion rings, folded lettuce, and tomato. Add mayo to the top bun and crown.
Notes
Do not over-mix the turkey meat to keep it tender.
Closing & Call to Action
Transitioning from a standard burger to this Juicy Turkey Burger Recipe is a revelation in home cooking. With the right searing technique and high-quality ingredients like brioche and fresh herbs, you can create a restaurant-quality meal in under 30 minutes.
We would love to see your culinary creations! If you made this burger, leave a comment below and tell us how your sear turned out. Don’t forget to follow us on Pinterest for more gourmet inspiration and share this recipe with your fellow home cooks.