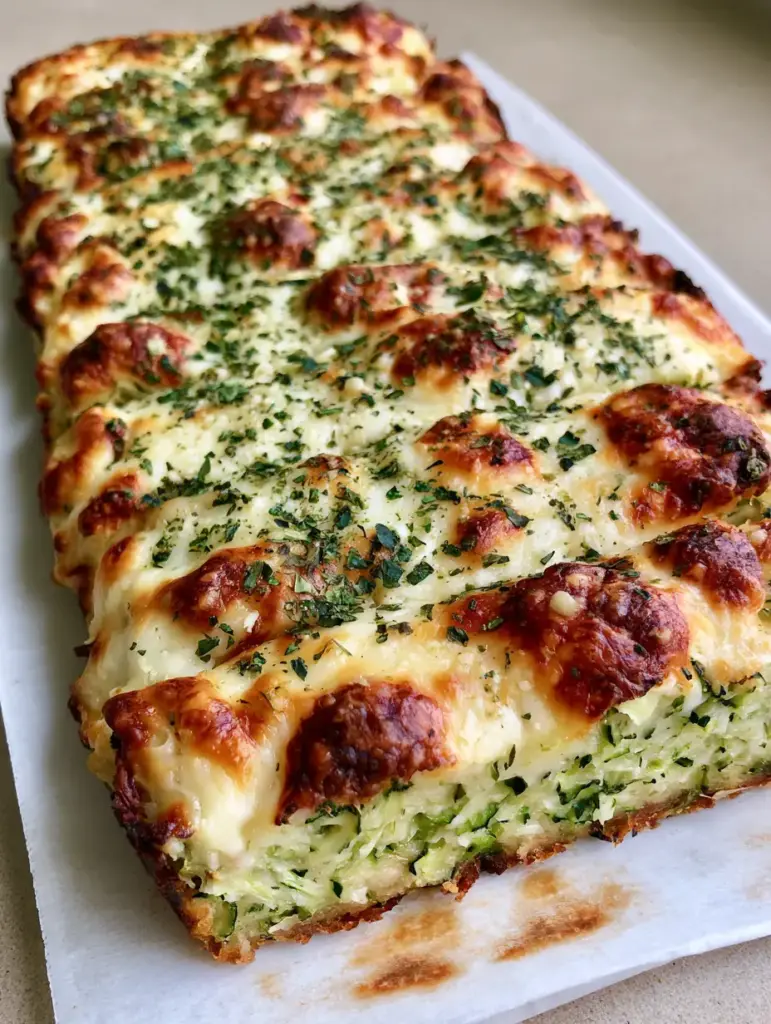
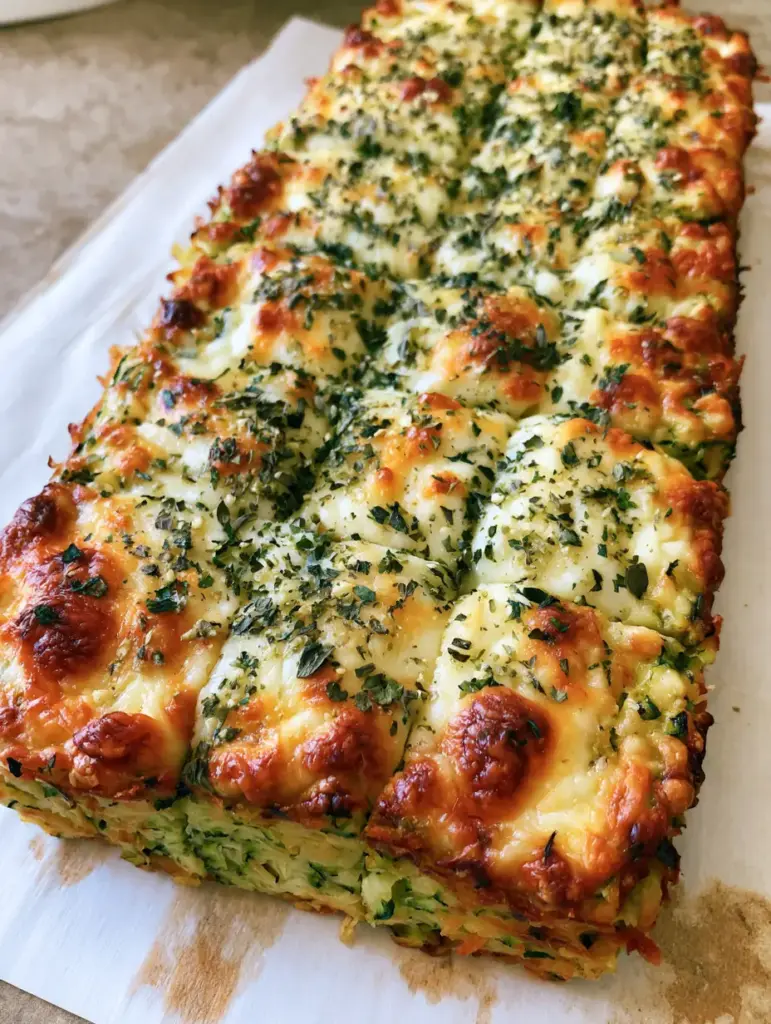
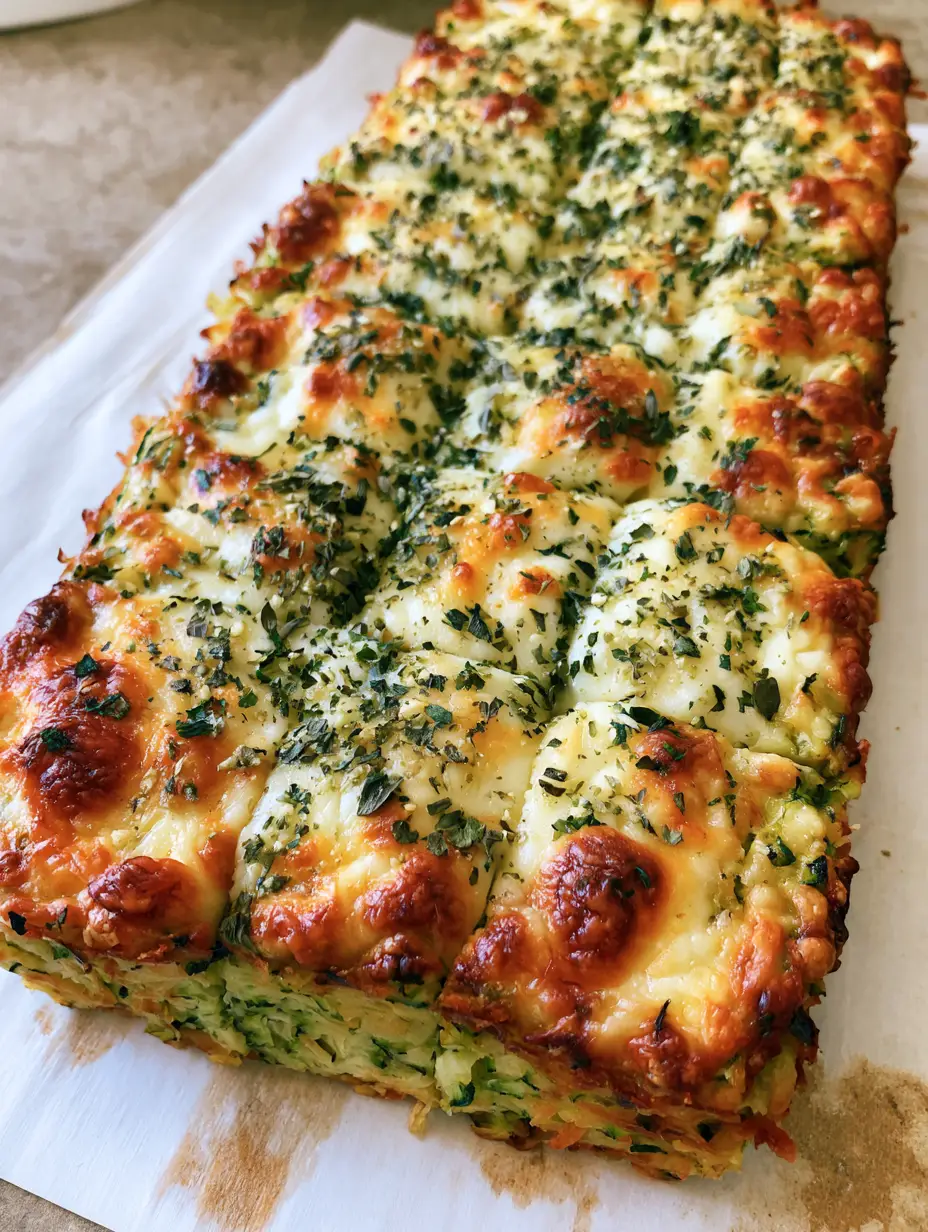
If you are looking for the ultimate low-carb alternative to traditional garlic bread, these Cheesy Zucchini Breadsticks are about to become your new kitchen obsession. Imagine a dense, thin, green-flecked crust made entirely of nutrient-dense zucchini, topped with a thick, molten layer of mozzarella that boasts those iconic golden-brown charred cheese bubbles.
This recipe isn’t just about cutting carbs; it is about celebrating the incredible texture and flavor that fresh summer squash can provide when handled with professional culinary techniques. These breadsticks are structurally sound enough to be handheld, making them the perfect companion for your favorite dipping sauces or as a side to a hearty protein.
Every bite delivers a punch of savory garlic powder, the earthy aroma of dried oregano flakes, and the bright finish of dried parsley. Whether you are hosting a game day gathering or just trying to sneak more vegetables into a family dinner, this rectangular slab of cheesy goodness is guaranteed to disappear in minutes.
Why You Will Crave These Low-Carb Zucchini Breadsticks
- The Perfect Snap: Unlike soggy veggie bakes, our forensic squeezing method ensures a dense, thin crust that actually holds its shape when lifted.
- Double Cheese Dimension: We use a combination of melty mozzarella for that epic cheese pull and toasted parmesan for a sharp, nutty crunch.
- Visual Masterpiece: The surface is a landscape of vibrant golden-brown toasted spots and charred bubbly edges that look as good as they taste.
- Herb-Forward Profile: The heavy seasoning of dried green oregano flakes and parsley provides a nostalgic pizzeria aroma that fills your entire home.
The Essential Elements for a Fail-Proof Zucchini Crust
Fresh Zucchini: You will need about 4 cups (950ml) of shredded zucchini, which is typically 2-3 medium-sized squashes. Zucchini provides the structural “green-flecked” base and a mild flavor that carries the seasonings perfectly.
Large Egg: One large egg acts as the primary protein binder. It works with the cheese to solidify the shredded zucchini into a cohesive, sliceable slab during the initial bake.
Shredded Mozzarella Cheese: Use 1.5 cups (170g) of low-moisture, part-skim mozzarella. This is what creates the “thick, melted layer” and those beautiful charred bubbles under the broiler.
Grated Parmesan Cheese: You need 0.5 cups (45g) of parmesan for both the crust and the topping. Its lower moisture content helps “toast” the top layer to a golden-brown finish.
Garlic Powder: 1 tsp (3g) of fine granules of garlic powder ensures even flavor distribution. It provides that classic “breadstick” soul without the moisture of fresh garlic which could compromise the crust.
Dried Oregano & Parsley: 1 tsp (1g) of each herb provides the “vibrant green flakes” seen in the visual blueprint. These dried herbs have a more concentrated flavor that stands up well to high-heat baking.
Kosher Salt: 0.5 tsp (3g) is vital for the “sweating” process. Salt draws the water out of the zucchini cells, which is the most critical step for a crispy result.
Must-Have Kitchen Tools for the Perfect Slab
To achieve the “rectangular slab” look resting on “stained white parchment paper,” you will need a standard 9×13 inch (23x33cm) baking sheet. A high-quality baking sheet ensures even heat distribution so the edges char without the center remaining raw.
A clean cheesecloth or a thin kitchen towel is your most important tool for this recipe. You cannot simply drain the zucchini; you must physically squeeze the liquid out until the pulp is almost dry to the touch.
Finally, a sharp pizza cutter is recommended for slicing the vertical breadsticks. This allows you to cut through the thick mozzarella layer cleanly without dragging the cheese off the zucchini base.
How to Construct Your Cheesy Zucchini Breadsticks
Step 1: The Forensic Moisture Removal Process
Start by grating your zucchini using the large holes of a box grater. Place the shreds into a large bowl and toss with the kosher salt, letting it sit for 10 minutes to macerate.
Transfer the zucchini to your cheesecloth. Squeeze with all your strength over the sink until no more liquid pearls through the fabric; you should be left with a dry, concentrated ball of zucchini pulp.
Step 2: Mixing the Green-Flecked Base
Preheat your oven to 425°F (220°C) and line your baking sheet with a piece of white parchment paper. In a medium bowl, combine the squeezed zucchini, the egg, half of the parmesan, and half of the garlic powder.
Mix until the egg is fully incorporated and the zucchini is evenly coated. This mixture will be the foundation of your dense, thin, green-flecked crust.
Step 3: The Initial Crust Set Bake
Transfer the mixture to the parchment paper and press it into a tight, rectangular slab about 1/4 inch (0.6cm) thick. Use the back of a spoon to ensure the edges are straight and the thickness is uniform.
Bake for 15-18 minutes. You are looking for a sensory cue where the edges start to turn golden and the surface feels firm and dry to the touch, indicating the proteins in the egg have set.
Step 4: Creating the Thick Molten Topping
Remove the tray from the oven and immediately cover the crust with the remaining mozzarella and parmesan cheese. Be generous with the edges to ensure those “charred bubbly edges” form later.
Sprinkle the surface heavily with the dried oregano flakes, dried parsley, and the remaining garlic powder. The green herbs should pop beautifully against the white cheese.
Step 5: The High-Heat Finish
Return the pan to the oven for 8-10 minutes. For the final touch, turn on the broiler for 1-2 minutes, watching closely through the oven window.
Wait for the visual cue of “golden-brown toasted spots” and “charred cheese bubbles.” Once the cheese is bubbling violently and showing deep brown caramelization, remove it from the heat.
Pro Tips for Culinary Excellence
- The “Dry” Test: After squeezing, the zucchini should feel like damp sawdust. If it still feels slippery or wet, squeeze it again; moisture is the enemy of a handheld breadstick.
- Parchment is Non-Negotiable: Do not try to bake these directly on a greased pan. The parchment paper absorbs a tiny bit of the remaining oils and ensures the crust doesn’t stick.
- Rest Before Slicing: Let the slab sit for 5 minutes after coming out of the oven. This allows the cheese to “set,” ensuring clean vertical slices that don’t slide apart.
- Uniform Thickness: If your slab is thinner in the middle, it will be floppy. Take the time to flatten the mixture evenly for a professional, “handheld smartphone photo” quality result.
Smart Storage and Reheating Strategies
If you have leftover breadsticks, store them in an airtight container in the refrigerator for up to 3 days. The crust will naturally soften as it sits, but the flavor remains excellent.
To regain that crispy texture, avoid the microwave. Reheat the breadsticks in an air fryer at 350°F (175°C) for 3-4 minutes, or in a toaster oven until the cheese is bubbling again.
You can also freeze these! Place the baked and cooled sticks on a tray to flash-freeze, then transfer to a freezer bag. Reheat directly from frozen in a 400°F (200°C) oven for 10 minutes.
What to Serve With Cheesy Zucchini Breadsticks
These savory sticks are incredibly versatile. For a classic appetizer experience, serve them alongside a bowl of creamy Greek tzatziki for a refreshing, cooling contrast to the garlic and herbs.
If you are looking for a more decadent pairing, dip these breadsticks into a warm ramekin of roasted garlic cowboy butter. The extra garlic punch and richness of the butter elevate the toasted parmesan notes.
For a complete low-carb meal, these breadsticks make a fantastic side dish for air fryer dill pickle chicken. The acidity of the pickles cuts through the richness of the melted mozzarella perfectly.
Frequently Asked Questions
Absolutely. Think of the zucchini slab as a pizza crust. You can add pepperoni, jalapeños, or red pepper flakes, but avoid heavy wet toppings that might make the thin crust soggy.
Yes, but thaw it completely first. Frozen zucchini releases even more water, so you will need to squeeze it extra hard to achieve the dense, thin crust texture.
The key is removing moisture. You must salt the shredded zucchini to draw out water and then use a cheesecloth to squeeze it until it’s completely dry before mixing the crust.
Yes! By using only egg and cheese as binders for the zucchini, these breadsticks are naturally low-carb and high-protein, fitting perfectly into a keto lifestyle.
Use an air fryer or toaster oven at 350°F (175°C) for a few minutes. This helps the cheese recrisp and the crust stay firm, whereas a microwave will make them soft.
The Ultimate Cheesy Zucchini Breadsticks Recipe
Cheesy Zucchini Breadsticks with Crispy Parmesan Crust
Ingredients
Equipment
Method
- Shred the zucchini and toss with salt in a bowl. Let sit for 10 minutes.
- Place zucchini in a cheesecloth and squeeze until very dry and no more liquid comes out.
- Mix squeezed zucchini, egg, 1/4 cup parmesan, and 1/2 tsp garlic powder.
- Press onto parchment-lined pan into a 1/4 inch thick rectangle.
- Bake at 425°F (220°C) for 15-18 minutes until firm and golden at the edges.
- Top with mozzarella, remaining parmesan, oregano, parsley, and remaining garlic powder.
- Bake for 8-10 minutes, then broil for 1-2 minutes until charred bubbles form.
Notes
Let the breadsticks rest for 5 minutes before slicing for the best texture.
Join the Savor Community!
These Cheesy Zucchini Breadsticks are the perfect way to enjoy the flavors of a classic pizzeria snack while keeping things light and veggie-packed. The combination of the thin, green-flecked crust and the bubbly, charred cheese is a sensory experience you won’t soon forget.
If you loved this recipe, please leave a comment and a star rating below! Don’t forget to share your own “handheld smartphone photos” of your creations on social media. For more daily recipe inspiration, follow us at Pinterest and join our newsletter for the latest culinary forensic deep-dives.