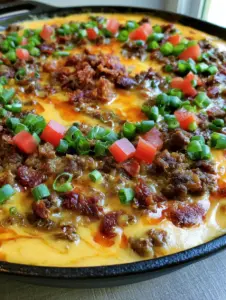
Imagine the ultimate comfort food fusion: the juicy, savory satisfaction of a classic cheeseburger encapsulated in a soft, airy, golden-brown dough. These Cheeseburger Bombs are not just a snack; they are a culinary experience designed to hit every sensory note. When you pull one of these apart, the first thing you notice is the “cheese pull”—that thick, gooey yellow cheddar stretching from a core of perfectly seasoned, browned ground beef crumbles.
The exterior is a masterclass in texture. We brush each bomb with a rich garlic butter glaze that creates a shiny, buttery sheen, then coat it in fine parmesan cheese granules and vibrant flakes of dried parsley. A quick stint in a high-heat oven ensures slight charring on the surface, mimicking the griddle-kissed crust of a gourmet burger. This is the handheld meal you have been searching for, perfect for game days, busy weeknights, or anytime you crave a bite-sized explosion of flavor.

Why These Handheld Burger Bites Are a Total Game-Changer
- Textural Contrast: You get a soft, airy dough structure that contrasts beautifully with the slight exterior crunch and the tender beef filling.
- Flavor Layering: We don’t just season the meat; we season the “crust” with a garlic-infused butter and a double-hit of umami from the parmesan cheese.
- Mess-Free Indulgence: All the flavors of a sloppy cheeseburger are sealed inside, making these the perfect portable meal for kids and adults alike.
- Visual Appeal: With their golden-brown hue and flecks of parsley, these look like they came from a high-end bistro, as seen in our professional photography.
The Anatomy of the Perfect Cheeseburger Bombs Ingredient List
To achieve the specific results seen in our visual blueprint, every ingredient must serve a structural or flavor-based purpose. We don’t settle for “good enough”; we aim for culinary excellence.
Ground Beef (1 lb / 454g): We recommend an 80/20 lean-to-fat ratio. This ensures the filling remains juicy inside the dough without creating an oily mess that compromises the seal.
Sharp Yellow Cheddar (4 oz / 113g): Using a block of sharp cheddar cut into cubes, rather than shredded cheese, provides that “thick, gooey core” described in our visual prompt. It melts slower and stays more viscous.
Refrigerated Biscuit Dough (16 oz / 454g): For that soft, airy texture, a high-quality buttermilk biscuit dough provides the leavening needed to puff up significantly in the oven.
Unsalted Butter (4 tbsp / 56g): We use unsalted butter as the base for our glaze to control the sodium levels, allowing the parmesan and beef seasoning to shine.
Fresh Garlic (2 cloves, minced): Infusing the butter with fresh garlic provides a pungent, aromatic punch that dried powder simply cannot replicate.
Grated Parmesan Cheese (1/4 cup / 25g): Use the finely granulated variety here. It adheres to the buttery surface of the Cheeseburger Bombs better than large shreds, creating that “sandy” gourmet finish.
Dried Parsley (1 tsp / 1g): These flakes add a pop of color and a subtle earthy note that balances the richness of the beef and butter glaze.
Foundational Seasonings: You will also need 1 tsp (6g) kosher salt, 1/2 tsp (1g) black pepper, and 1/2 tsp (1g) onion powder to ensure the beef crumbles are deeply flavorful.
Essential Equipment for Professional Results
To mirror the “handheld smartphone photo” aesthetic, you need the right tools to achieve that specific char and shine. A heavy-duty rimmed baking sheet is the first requirement to ensure even heat distribution across the bottom of the dough.
A cast-iron skillet is highly recommended for browning the beef crumbles. The superior heat retention of cast iron triggers the Maillard reaction more effectively, giving the meat those deep brown, flavorful edges seen in the cross-section of our “torn open” bomb.
Finally, a silicone pastry brush is non-negotiable. This tool allows you to apply the garlic butter glaze evenly across the curved surface of the dough balls without deflating their airy structure. A wire cooling rack will also prevent the bottoms from getting soggy after they leave the oven.

Step-by-Step Instructions: Mastering the Cheeseburger Bombs
Preparing the Savory Beef Filling
Heat your skillet over medium-high heat. Add the ground beef, breaking it into small crumbles with a wooden spoon. This is vital; small crumbles allow for a more compact filling that won’t pierce the dough.
Season the meat with salt, pepper, and onion powder once it is about 50% browned. Continue cooking until the beef is fully browned and has developed a slight crust. Drain any excess fat thoroughly to ensure a clean “bomb” assembly.
Assembling the Dough Spheres
Preheat your oven to 400°F (204°C). This high temperature is the secret to achieving that “slight charring” mentioned in the visual description while keeping the inside soft.
Flatten each biscuit dough round into a 4-inch (10cm) circle. Place 1 tablespoon (15g) of the browned beef and one cube of cheddar in the center. Carefully pinch the edges together, rotating the dough to create a tight, seamless seal. Roll it gently between your palms to form a perfect sphere.
The Secret Garlic Parmesan Glaze
Melt the butter in a small bowl and stir in the minced garlic. Use your pastry brush to generously coat the top and sides of each dough ball. The butter acts as the “glue” for our toppings.
Sprinkle the fine parmesan granules and dried parsley flakes over the top. The visual goal is a “shiny, buttery exterior” with visible green flecks and white cheese granules. Arrange them on your baking sheet, leaving at least 2 inches (5cm) of space between each.
Baking for Optimal Texture and Color
Bake for 12-15 minutes. Watch for the sensory cues: the aroma of toasted garlic should fill the kitchen, and the dough should transition from pale to a deep golden-brown.
For that authentic “slight charring,” you can switch the oven to broil for the final 60 seconds. Keep a close eye on them; the parmesan can go from golden to burnt very quickly. Remove from the oven and let rest for 3 minutes to allow the cheese core to set slightly before serving.
Pro Secrets for the Ultimate Soft and Airy Texture
One common mistake is overworking the dough. When flattening your biscuit rounds, handle them as little as possible. This preserves the internal CO2 bubbles, ensuring the “soft, airy texture” described in the Midjourney prompt.
Another tip is the “temperature bridge.” If your beef filling is piping hot when you put it in the dough, it can start to “cook” the dough from the inside out, leading to a gummy interior. Let the meat cool for about 5-10 minutes before assembly.
Finally, ensure your parmesan is the finely grated “granule” type. Freshly shaved parmesan is delicious, but it won’t provide the uniform, professional coating seen in the visual blueprint. If you want to expand your appetizer repertoire, consider trying our homemade corn dog bites for a similar handheld experience.
Storage, Reheating, and Make-Ahead Advice
These Cheeseburger Bombs are best enjoyed fresh, but they do store surprisingly well. Place leftovers in an airtight container and refrigerate for up to 3 days. To maintain the crispy exterior and “gooey core,” avoid the microwave if possible.
Instead, reheat them in an air fryer or oven at 350°F (177°C) for 5-7 minutes. This revitalizes the garlic butter glaze and ensures the dough doesn’t become rubbery. If you are prepping for a party, you can assemble the bombs (without the glaze) up to 4 hours in advance and keep them covered in the fridge.
Creative Pairing Ideas: What to Serve with Your Cheeseburger Bombs
While these are a meal in themselves, pairing them with the right sides can elevate the entire dinner. To cut through the richness of the butter and cheese, a crisp, acidic side is essential. Our homemade coleslaw recipe provides the perfect crunch and tang to balance the savory beef.
If you’re serving these as part of a larger spread, they sit beautifully alongside other “twist on a classic” dishes. Consider serving them with smash burger tacos for a burger-themed party that your guests will never forget. For a refreshing beverage, a cold glass of lemonade or a light beer works wonders.
Frequently Asked Questions
Yes, they freeze beautifully. Let them cool completely, freeze on a tray, then transfer to a bag. Reheat from frozen in the oven at 375°F (190°C) for 15 minutes.
Yes! Cook them at 350°F (177°C) for 8-10 minutes. The air fryer is excellent for achieving that ‘slight charring’ and a very crispy garlic parmesan exterior.
Absolutely. Use ground turkey as a 1:1 substitute. Just ensure you season it well and add a teaspoon of olive oil if the turkey is very lean to keep it juicy.
Ensure you use a cube of cheddar rather than shredded cheese, and pinch the dough edges very tightly. Rolling the ‘bomb’ between your palms after sealing helps create a uniform barrier.
For a soft and airy texture, refrigerated buttermilk biscuit dough is the best choice. It provides a significant rise and a buttery flavor that complements the beef.
The Master Recipe for Cheeseburger Bombs

Cheeseburger Bombs with Garlic Parmesan Glaze
Ingredients
Equipment
Method
- In a cast iron skillet over medium-high heat, brown the ground beef into small crumbles. Season with salt, pepper, and onion powder.
- Drain all excess grease and let the meat cool slightly for 5-10 minutes.
- Preheat oven to 400°F (204°C). Flatten each biscuit dough round into a 4-inch (10cm) circle.
- Place 1 tbsp of beef and one cube of cheddar in the center. Pinch edges tightly to seal and roll into a smooth ball.
- Mix melted butter and minced garlic. Brush generously over the dough balls.
- Sprinkle with parmesan granules and dried parsley flakes.
- Bake for 12-15 minutes on a rimmed baking sheet until golden-brown with slight charring.
Notes
Use high heat (400°F) for the best airy texture and exterior browning.

Closing & Call to Action
These Cheeseburger Bombs are the ultimate crowd-pleaser, combining the rustic charm of a home-cooked meal with the polished look of a professional recipe. Whether you are tearing one open to reveal that gooey cheddar core or savoring the garlic-parmesan crust, every bite is designed to satisfy.
Did you make these? We want to see your results! Leave a comment below or tag us in your photos. Don’t forget to follow us on Pinterest for more visually stunning recipe inspiration like this! Save this recipe to your “Easy Dinners” board so you always have it on hand.