When the craving for sizzling Tex-Mex hits, nothing beats the convenience and explosive flavor of Sheet Pan Chicken Fajitas. This recipe transforms humble chicken breasts and vibrant bell peppers into a restaurant-quality feast using just a single baking sheet. It is the ultimate solution for busy weeknights when you want a nutritious, high-protein meal without a mountain of dishes to wash afterward.
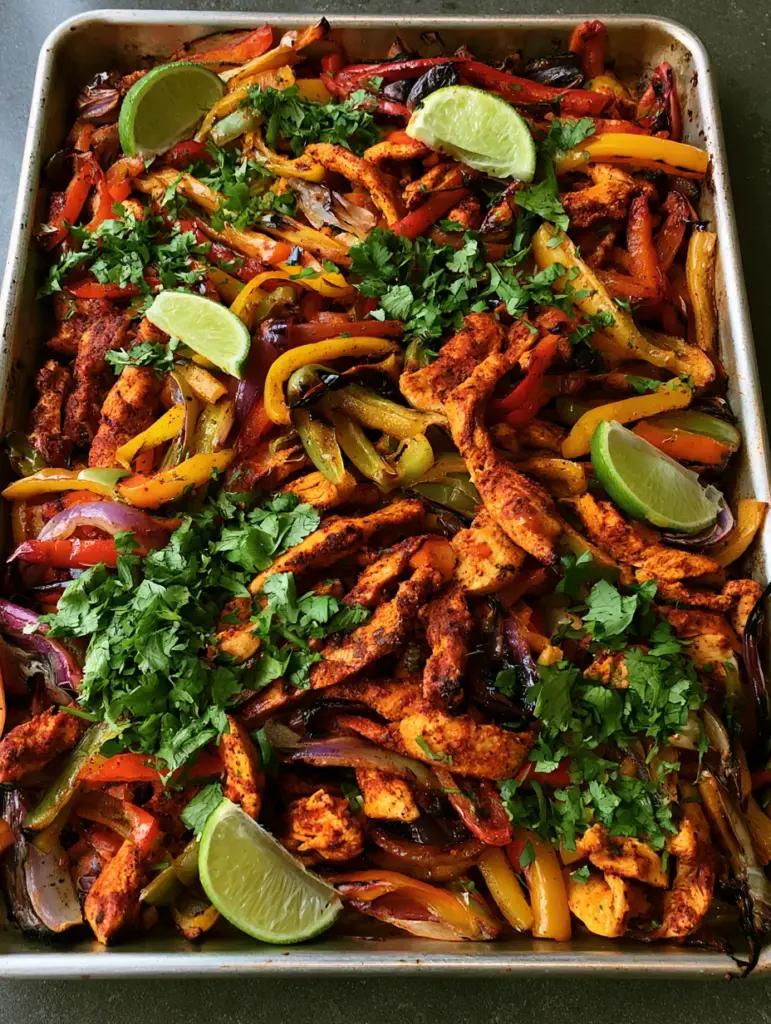
Imagine the aroma of smoky cumin and chili powder wafting through your kitchen as the chicken develops a deep, reddish-brown crust. We are aiming for that perfect “forensic” visual: blistered pepper skins, softened red onion wedges, and chicken strips that are juicy on the inside but caramelized on the outside. By using high-heat roasting, we achieve the same Maillard reaction that makes skillet-seared fajitas so iconic.
The beauty of this method lies in its simplicity and the concentrated flavor that comes from roasting. Unlike stovetop versions where juices can sometimes steam the meat, the wide surface area of a metallic sheet pan allows moisture to evaporate quickly. This ensures your vegetables remain tender-crisp while the chicken develops those charred, savory edges seen in professional food photography.
Why You Will Love These Sizzling Sheet Pan Fajitas
- Visual Perfection: Every bite features the charred, blistered skins of red, yellow, and green bell peppers for a rainbow of textures.
- Effortless Cleanup: By using a single metallic baking sheet, you reduce your post-dinner cleanup to just one pan and a cutting board.
- Deep Flavor Profile: A custom spice rub ensures every chicken strip is coated in a savory, smoky layer of chili, cumin, and garlic.
- Perfectly Balanced: The combination of roasted red onion wedges and fresh, zesty lime wedges creates a dynamic flavor contrast.
- Customizable Heat: Easily adjust the spice level to suit your family’s palate while maintaining that authentic Tex-Mex soul.
The Science Behind the Sizzle: Key Ingredients
To achieve the specific visual and textural results of this recipe, every ingredient serves a dual purpose for flavor and structure. We aren’t just tossing things on a pan; we are layering flavors and fats to ensure a professional result.
Chicken Breast Strips: 1.5 lbs (680g) of boneless, skinless chicken breast. Slicing these into uniform 1/2-inch strips ensures they cook at the same rate as the peppers, remaining juicy while the exterior sears.
The Tricolor Pepper Blend: 1 red, 1 yellow, and 1 green bell pepper (approx. 500g total). Using all three colors isn’t just for the “Visual Recipe Blueprint”; it provides a range of sweetness levels that caramelize beautifully under high heat.
Red Onion Wedges: 1 large red onion (200g), cut into thick wedges. Wedges hold their structure better than thin slices during roasting, providing those softened, charred petals shown in the prompt.
The “Visible Spice Rub” Base: 2 tbsp (30ml) Avocado oil or high-smoke-point oil. Oil is the heat conductor that allows the spices to bloom and prevents the chicken from drying out in the oven’s dry heat.
Dry Spice Cluster: 1 tbsp (7g) Chili powder, 1 tsp (2g) Cumin, 1 tsp (2g) Smoked Paprika, 1/2 tsp (1g) Garlic powder, and 1/2 tsp (3g) Kosher salt. This mixture creates the “reddish-brown” coating that gives the dish its signature seared look.
Fresh Garnishes: 1/2 cup (15g) Coarsely chopped cilantro and 2 fresh limes. The lime juice provides the necessary acid to cut through the roasted flavors, while the cilantro adds a pop of fresh green against the charred background.
The Gear for Perfect Caramelization
Achieving the blistered edges seen in the 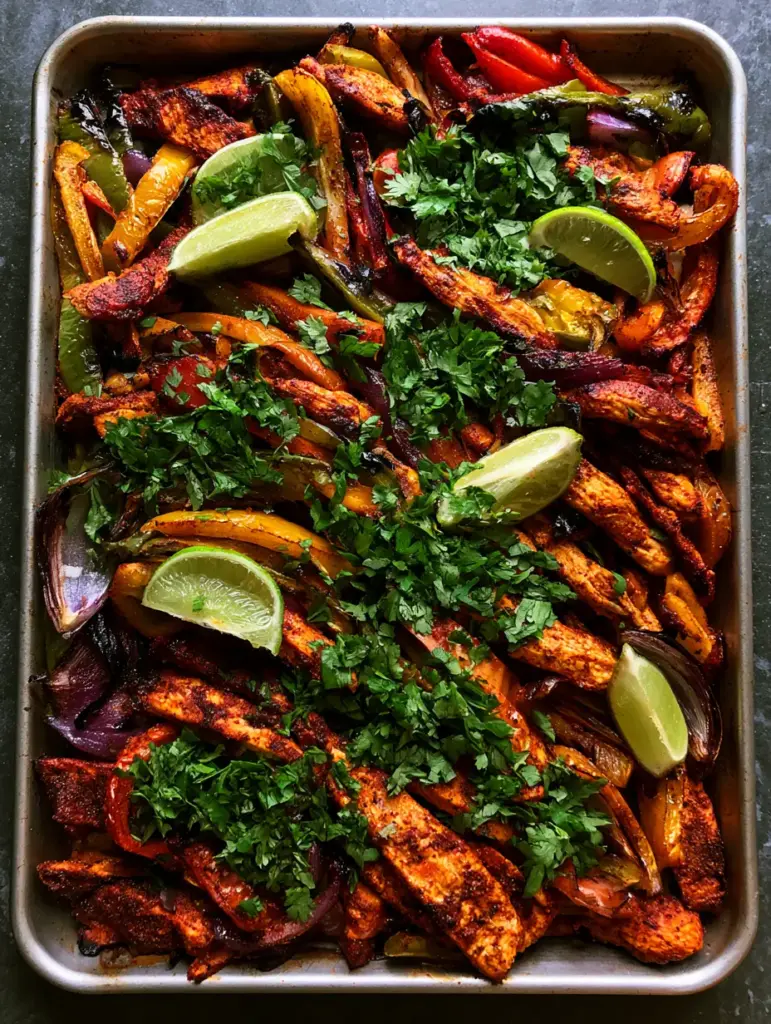
A heavy-duty metallic rimmed baking sheet (half-sheet size) is non-negotiable. Metal conducts heat faster than glass or ceramic, which is essential for searing the bottom of the chicken and peppers. If you use a pan that is too small, the ingredients will “crowd,” leading to steaming instead of roasting.
You will also need a sharp chef’s knife to ensure the chicken and peppers are sliced to uniform thickness. Consistency in size equals consistency in cooking time. A large mixing bowl is also recommended for tossing the ingredients in the spice rub to ensure 100% coverage before they hit the pan.
Master the Sheet Pan Technique: Step-by-Step
1. Preheating for Power
Position your oven rack in the upper-middle position and preheat to 425°F (220°C). A hot oven is the secret to getting those “caramelized edges” without overcooking the center of the chicken breasts. If your oven has a convection setting, this is the time to use it to circulate the hot air for better blistering.
2. Prepping the Blueprint Ingredients
Slice your chicken breast against the grain into long, thin strips. Core the red, yellow, and green bell peppers and slice them into 1/4-inch strips. Cut the red onion into wedges, keeping the root end slightly intact so they don’t disintegrate completely but still soften into the “wedges” described in our visual prompt.
3. The Visible Spice Coating
In a large bowl, combine the chicken, peppers, and onions. Drizzle with the avocado oil and sprinkle the chili powder, cumin, smoked paprika, garlic powder, and salt over the top. Toss vigorously with your hands or tongs until every surface is coated in the reddish-brown seasoning. You should see the spice granules clinging to the meat and vegetables.
4. The Roasting Ritual
Spread the mixture onto the metallic baking sheet in a single, even layer. Do not overlap the chicken strips; they need space for the hot air to reach the edges. Roast for 18–22 minutes. At the 15-minute mark, use a spatula to toss the ingredients gently, ensuring the “blistered, charred skins” develop on all sides of the peppers.
5. The Visual Finish
Once the chicken is cooked through and the vegetables show dark, caramelized edges, remove the pan from the oven. Immediately squeeze the juice of half a lime over the hot pan—it will sizzle and deglaze the flavorful browned bits. Top with a generous sprinkle of coarsely chopped cilantro and arrange the remaining lime wedges across the pan for that handheld smartphone photo aesthetic.
Pro-Level Fajita Secrets for Success
- Avoid the “Soggy” Trap: Ensure your vegetables are completely dry before adding oil. Excess water on the peppers will create steam, preventing the skins from blistering.
- Room Temperature Meat: If possible, let your chicken sit at room temperature for 15 minutes before roasting. This helps the exterior sear faster while the interior stays moist.
- The Broiler Trick: If your oven doesn’t produce enough char by the time the chicken is done, pop the pan under the broiler for 2 minutes. Watch it like a hawk to prevent burning!
- Don’t Scrimp on Oil: The oil isn’t just for sticking; it creates the “fried” texture on the sheet pan that mimics a cast-iron skillet.
Meal Prep and Leftover Logic
Sheet Pan Chicken Fajitas are a meal prepper’s dream. The flavors actually deepen as they sit, making the leftovers just as delicious as the initial meal. Store the cooked mixture in an airtight container in the refrigerator for up to 4 days.
To reheat, avoid the microwave if you want to maintain the texture. Instead, toss the fajitas back onto a hot skillet or into an air fryer for 3-5 minutes. This will revive the charred edges and keep the peppers from becoming mushy. You can also freeze the roasted mixture for up to 3 months, though the peppers will be slightly softer upon thawing.
The Ultimate Tex-Mex Spread
While these fajitas are a star on their own, pairing them with the right sides elevates the entire experience. For a complete feast, serve them alongside warm flour or corn tortillas, sour cream, and a scoop of fresh guacamole.
If you want to keep things interesting, try serving the chicken and peppers over a bed of rice or inside a smoky chipotle chicken torta (coming soon) for a fusion twist. For a lighter side, this dish pairs beautifully with a creamy homemade coleslaw that provides a cooling crunch against the spicy chicken. If you have extra seafood on hand, you could even mix these roasted vegetables into zesty shrimp and avocado bowls for a surf-and-turf night.
For those watching their carb intake, skip the tortillas and serve the mixture with crispy roasted cauliflower. And don’t forget a refreshing drink—a cold glass of pineapple lemonade is the perfect sweet-tart counterpoint to the smoky cumin rub.
Frequently Asked Questions
Yes, this recipe is naturally low-carb. Simply serve the chicken and vegetable mixture in lettuce wraps or over a bowl of cauliflower rice instead of using flour tortillas.
Absolutely! Chicken thighs are more forgiving and stay very juicy. Just ensure they are sliced into similar strips and increase the cook time by 2-3 minutes if necessary.
The key is high heat (425°F) and not crowding the pan. Use a large metallic sheet pan so the moisture can evaporate quickly, allowing the skins to blister instead of steam.
While not required for this sheet pan method, you can toss the chicken in the spice rub and oil up to 4 hours in advance for deeper flavor penetration.
For the best flavor, char them slightly over an open gas flame for 10 seconds or wrap a stack in foil and place them in the oven during the last 5 minutes of roasting.
The Perfect Sheet Pan Chicken Fajitas Recipe
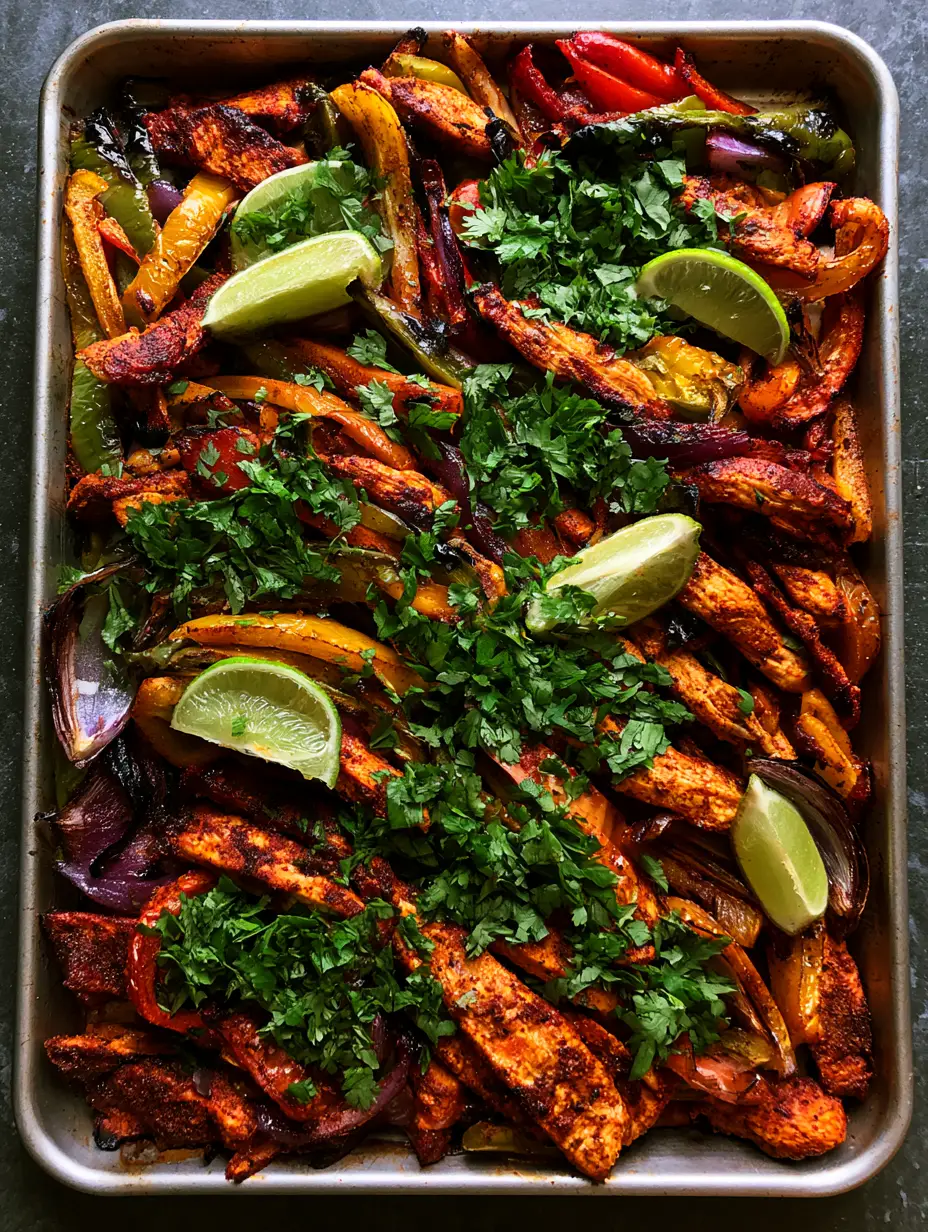
Sheet Pan Chicken Fajitas: The Ultimate Weeknight Sizzling Dinner
Ingredients
Equipment
Method
- Preheat your oven to 425°F (220°C). Position the rack in the upper-middle section.
- In a large bowl, toss the chicken strips, sliced peppers, and onion wedges with oil, chili powder, cumin, smoked paprika, garlic powder, and salt until evenly coated in the reddish-brown rub.
- Spread the mixture onto a metallic baking sheet in a single layer. Roast for 18-22 minutes, tossing once halfway through, until chicken is cooked and vegetables show charred, blistered edges.
- Remove from oven, squeeze fresh lime juice over the pan, and garnish with chopped cilantro.
Notes
Do not crowd the pan to avoid steaming the vegetables.
Bringing the Sizzle Home
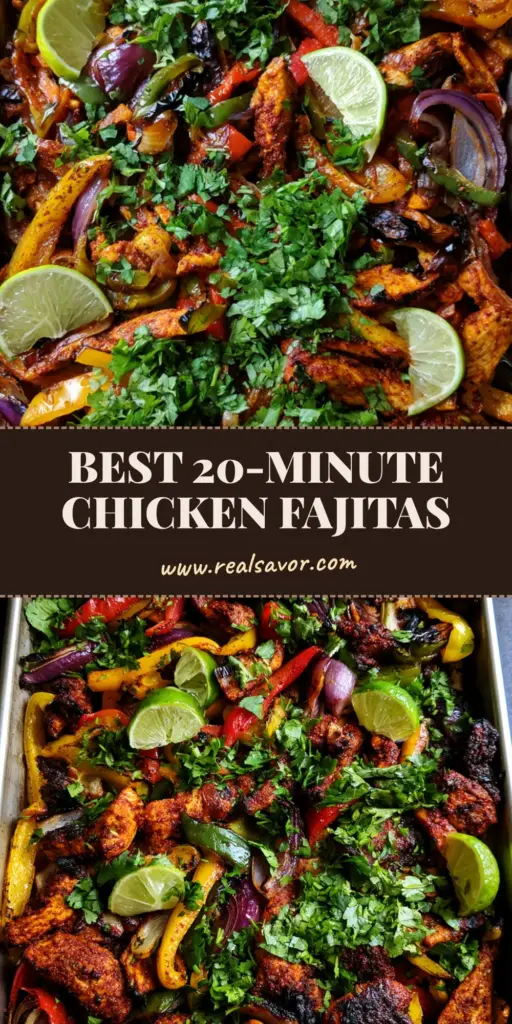
Mastering Sheet Pan Chicken Fajitas is about embracing the beauty of high-heat roasting and vibrant, fresh ingredients. By following this visual-aligned method, you ensure every plate looks exactly like a professional food blog post while tasting like a labor of love. The combination of charred peppers, smoky chicken, and bright lime is a timeless trio that never fails to satisfy.
We would love to see your kitchen creations! Did your peppers get that perfect blister? Tag us or leave a comment below with your favorite fajita toppings. Don’t forget to save this recipe to your “Easy Dinners” board on Pinterest so you always have a healthy, 30-minute meal ready to go!