There is a transformative moment in every home cook’s journey when they realize that the bread holding the meal together is just as important as the filling itself. Homemade Hot Dog Buns are the definitive upgrade to any backyard barbecue, elevating a simple grilled meal into a gourmet experience. Forget the squashed, dry, store-bought packs; we are talking about buns with a soft, matte-finished golden crust and a pillowy white interior that can support a juicy beef frank without falling apart.
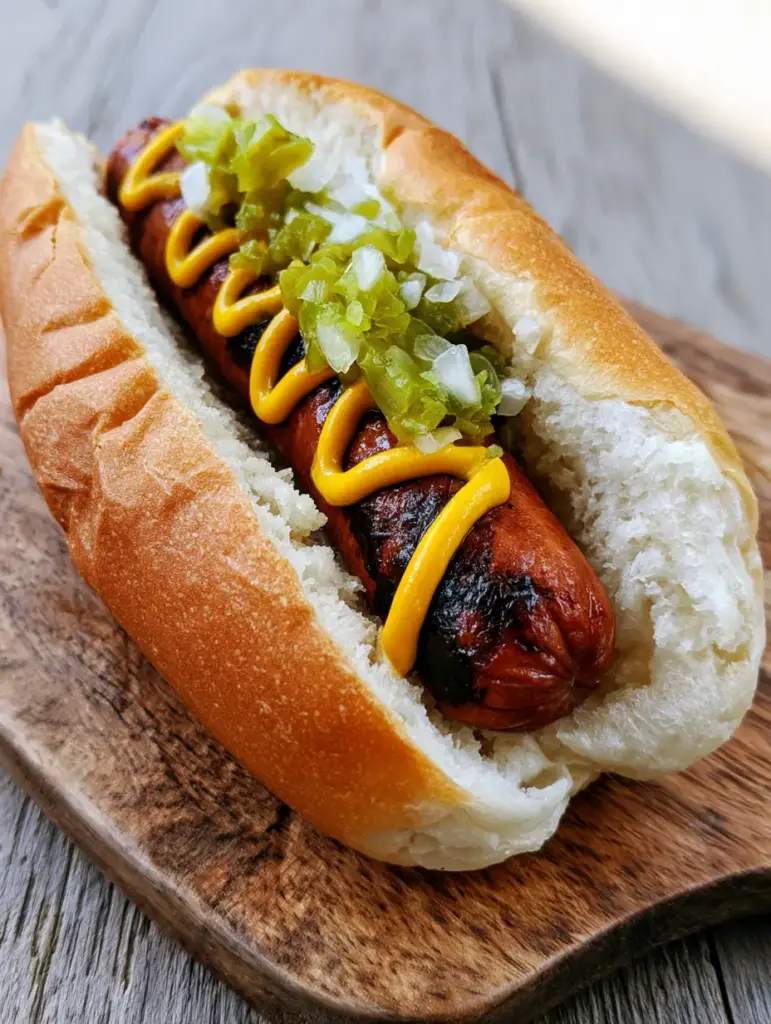
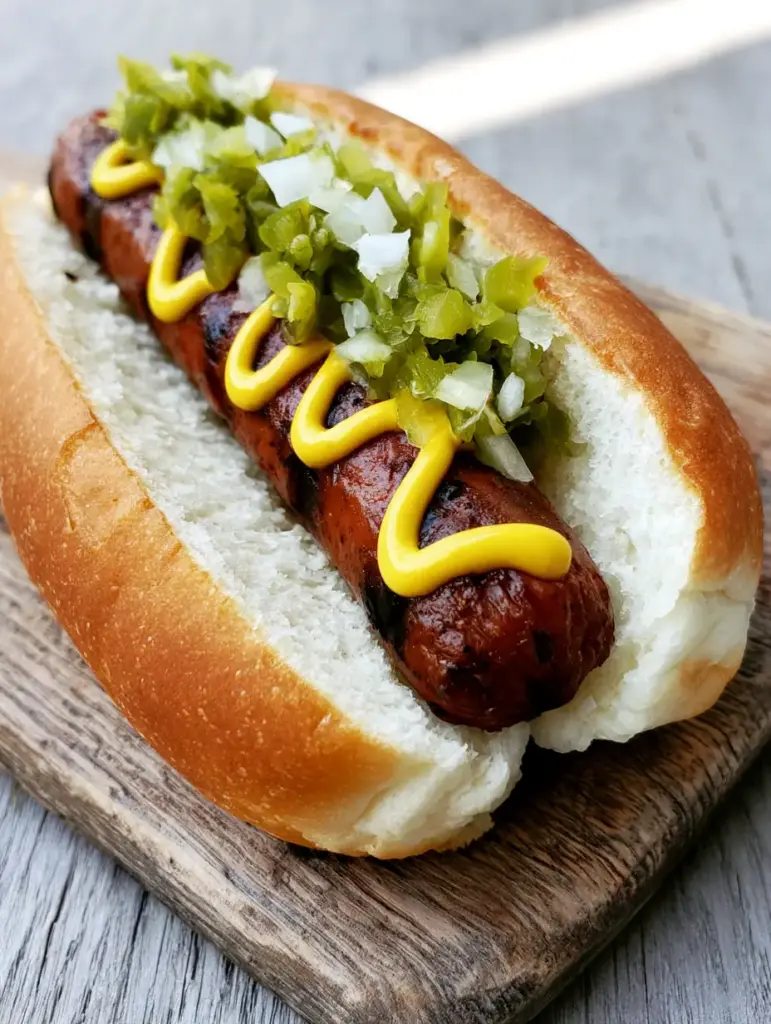
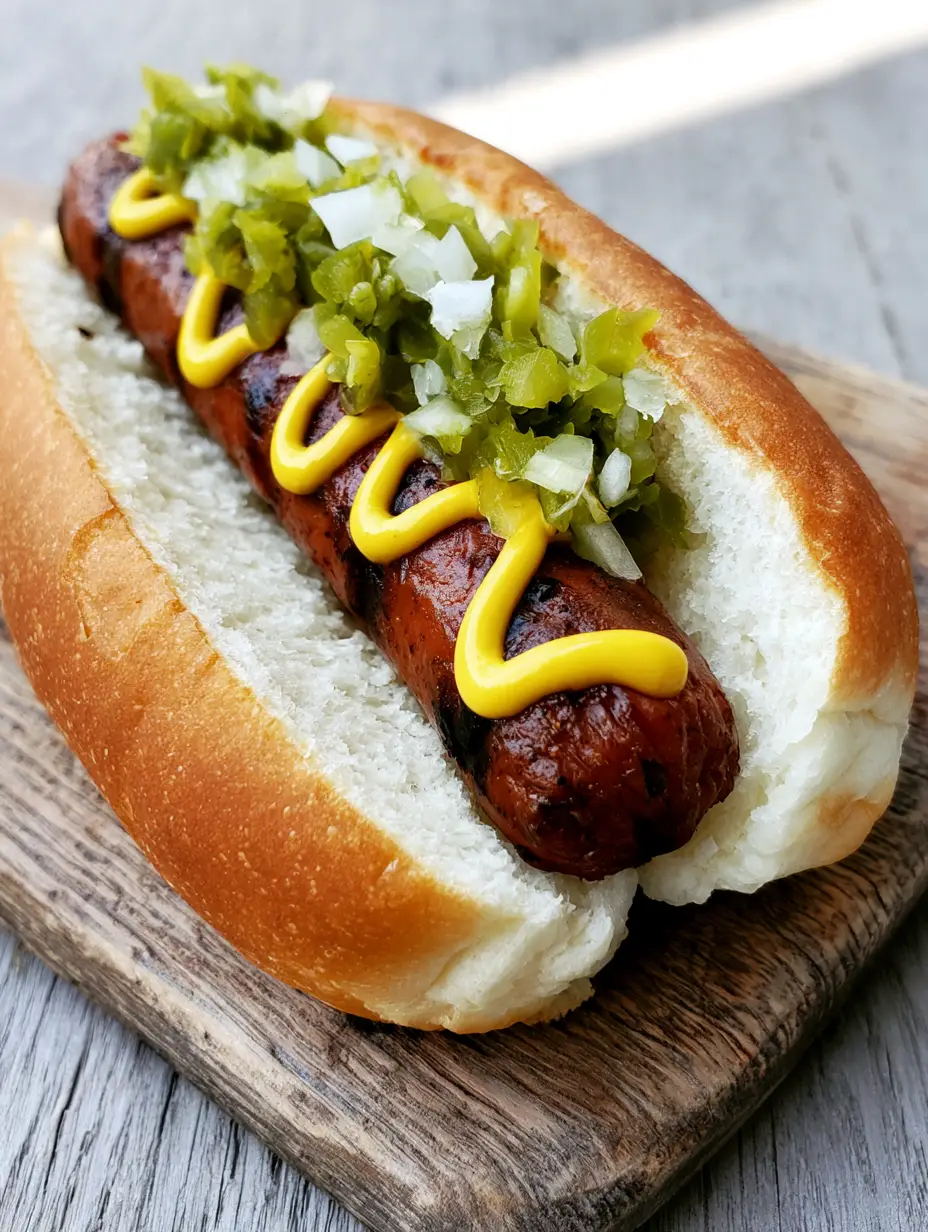
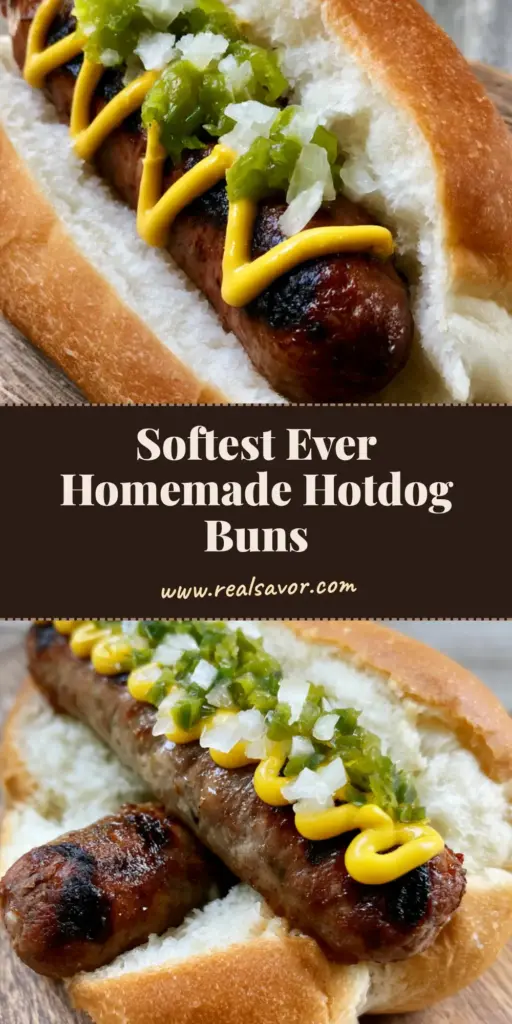
Imagine a handheld smartphone photo of your creation: a golden-brown homemade hot dog bun, sliced open on a rustic wooden board. Inside sits a perfectly grilled beef hot dog with visible dark char marks, topped with a precise zigzag of bright yellow mustard, vibrant neon-green sweet pickle relish, and finely diced translucent white onions. This recipe is designed to help you achieve that exact visual and culinary perfection in your own kitchen.
When you bite into these buns, you’ll notice the delicate resistance of the crust followed by a cloud-like crumb. The contrast between the soft yeast bun and the snap of a charred beef hot dog creates a sensory harmony that is impossible to find in a plastic bag at the grocery store. Whether you are hosting a summer bash or just craving a classic American comfort meal, mastering the art of the bun is a total game-changer.
Why These Pillowy Yeast Rolls Outshine Store-Bought Varieties
- Unmatched Texture: Unlike commercial buns that use chemical dough conditioners, these rely on slow fermentation and high-quality fats for a natural, airy structure.
- Structural Integrity: These buns are engineered to be soft but sturdy, ensuring they won’t crumble under the weight of heavy toppings or juicy grilled meats.
- The Golden Standard: We use a specific egg wash technique to achieve that matte-finished golden-brown crust seen in professional food photography.
- Customizable Flavor: By making Homemade Hot Dog Buns from scratch, you can control the sweetness and saltiness to perfectly complement your choice of beef hot dog.
- Visual Appeal: These buns look as good as they taste, featuring the uniform shape and professional finish that makes every plate look like a magazine cover.
The Science of Softness: Essential Ingredients for the Perfect Bun
To achieve the professional results described in our visual blueprint, each ingredient plays a critical role in the dough’s chemistry. We aren’t just mixing flour and water; we are building a structural network of gluten and fat.
Bread Flour or High-Protein All-Purpose Flour: 3 ½ cups (435g). The protein content is vital for creating the gluten strands that trap carbon dioxide, giving the bun its lift and “pillowy” interior.
Whole Milk: 1 cup (240ml). Milk provides the sugars and fats necessary for a soft crumb and a richer flavor than water-based doughs would produce.
Unsalted Butter: 4 tbsp (56g), softened. Butter coats the gluten strands, shortening them to ensure the bun remains tender rather than chewy like a baguette.
Active Dry Yeast: 2 ¼ tsp (7g). This is the engine of the recipe, responsible for the rise and that distinct, nostalgic “yeasty” aroma of fresh bread.
Granulated Sugar: 2 tbsp (25g). Sugar feeds the yeast and aids in the Maillard reaction, ensuring our buns reach that deep golden-brown color in the oven.
Fine Sea Salt: 1 ½ tsp (9g). Salt is essential for flavor and for regulating yeast activity so the buns don’t over-proof and collapse.
Large Egg: 1 for the dough, 1 for the wash. The egg in the dough adds structure and richness, while the egg wash creates the matte-finished golden crust.
Beef Hot Dogs: 8 high-quality links. Look for natural casing franks to ensure you get those beautiful dark char marks when they hit the grill.
The Toppings: Bright yellow mustard, neon-green sweet pickle relish, and finely diced white onions. These specific condiments provide the sharp, sweet, and acidic balance needed to cut through the rich bun.
Pro-Level Kitchen Tools for Bun Perfection
To achieve a consistent, professional shape, a few specific tools will make your life much easier. While you can certainly hand-knead, a stand mixer is your best friend for this high-hydration dough.
A digital kitchen scale is the most important tool for success. Measuring flour by volume (cups) is notoriously inaccurate; weighing your ingredients ensures every bun is the same size and bakes at the same rate. You will also need a bench scraper for dividing the dough cleanly without tearing the delicate gluten structure.
For the baking process, a heavy-duty rimmed baking sheet lined with parchment paper prevents the bottoms of the buns from burning. If you want that classic “side-pull” look, you can use a specific hot dog bun pan, but placing them close together on a flat sheet allows them to rise into each other, creating those soft white sides when pulled apart.
Step-by-Step Evolution of the Ultimate Homemade Hot Dog Buns
1. Activating the Yeast and Mixing the Dough
Begin by warming your 1 cup (240ml) of milk to approximately 105°F (40°C). If the milk is too hot, it will kill the yeast; too cold, and it won’t wake up. Stir in the sugar and the 2 ¼ tsp (7g) of active dry yeast. Let it sit for 5-10 minutes until a thick, foamy head forms on the surface—this is your sensory cue that the yeast is alive and ready to work.
In the bowl of a stand mixer, combine the yeast mixture with the beaten egg and half of the flour. Using the dough hook, mix on low speed until a shaggy mass forms. Gradually add the remaining flour and the salt. This staged approach allows the flour to hydrate properly, which is the secret to a smooth, workable dough.
2. The Art of the Knead
With the mixer on medium-low, begin adding the 4 tbsp (56g) of softened butter one tablespoon at a time. Wait until each piece is fully incorporated before adding the next. This “enriched dough” technique ensures the fat is evenly distributed, resulting in that pillowy white interior texture we are aiming for.
Knead the dough for 7-10 minutes. Look for the “windowpane test” cue: pull a small piece of dough and stretch it gently. If it stretches thin enough to see light through it without tearing, your gluten is perfectly developed. The dough should feel tacky to the touch but should not stick to your clean fingers.
3. The First Rise: Patience is Flavor
Shape the dough into a smooth ball and place it in a lightly greased bowl. Cover with a damp cloth or plastic wrap and place in a warm, draft-free spot. Let it rise for 60-90 minutes, or until it has doubled in size. This bulk fermentation is where the complex “bready” flavors develop, so don’t rush it.
4. Shaping for Visual Consistency
Gently deflate the dough and turn it out onto a lightly floured surface. Using your scale, divide the dough into 8 equal portions (roughly 80-90g each). To shape, roll each piece into a small rectangle, then fold the long sides into the middle and pinch the seam shut. Roll the cylinder under your palms until it is about 6 inches (15cm) long.
Place the shaped dough on your parchment-lined baking sheet, leaving about ½ inch (1.25cm) of space between them. This proximity is intentional; as they rise for the second time, they will touch, which forces them to grow “up” instead of “out,” resulting in a taller, fluffier bun.
5. The Final Proof and the Golden Bake
Cover the shaped buns and let them rise for another 45-60 minutes. They should look noticeably puffy and “inflated.” While they proof, preheat your oven to 375°F (190°C). Just before baking, whisk your remaining egg with a splash of water and gently brush the tops. This creates the matte-finished golden crust seen in the Midjourney prompt.
Bake for 15-18 minutes. The buns should be a deep golden-brown on top and sound hollow when tapped on the bottom. Transfer them to a wire rack immediately to prevent the bottoms from becoming soggy due to trapped steam.
Mastering the Grill: Char Marks and Assembly
Once your Homemade Hot Dog Buns have cooled slightly, it is time to prepare the star of the show. To achieve those visible dark char marks, preheat your grill to high heat. Lightly brush your beef hot dogs with a tiny bit of oil to prevent sticking and enhance heat transfer.
Place the franks on the grates at an angle. Listen for the sizzle—that is the sound of the Maillard reaction in action. Grill for 2-3 minutes per side, rotating only once to ensure those crisp, dark lines. While the dogs grill, slice your buns down the center (not all the way through) to reveal that pillowy white interior.
To assemble, place the hot dog in the bun. Apply a precise zigzag of bright yellow mustard from end to end. Follow with a generous spooning of vibrant neon-green sweet pickle relish on one side, and a sprinkle of finely diced translucent white onions on the other. The visual contrast of the yellow, green, and white against the charred beef is what makes this dish truly iconic.
Chef’s Secrets for Success
- Don’t Over-Flour: It’s tempting to add more flour if the dough feels sticky, but too much flour results in a dense, heavy bun. Trust the kneading process to tighten the dough.
- Temperature Control: If your kitchen is cold, your dough will take much longer to rise. You can create a “proof box” by placing the bowl in an unlit oven with a pan of boiling water on the rack below it.
- Steam for Softness: For an even softer crust, you can place a small pan of water at the bottom of the oven during the first 5 minutes of baking.
- The Onion Prep: To get those perfectly translucent white onions, dice them finely and soak them in ice water for 10 minutes before draining. This removes the harsh “bite” and keeps them crisp.
Preserving the Freshness: Storage and Reheating
Homemade Hot Dog Buns are at their absolute peak about 30 minutes after they come out of the oven, but they can be stored successfully. Keep them in an airtight container at room temperature for up to 2 days. For longer storage, these buns freeze beautifully. Wrap them individually in plastic wrap and place them in a freezer bag for up to 3 months.
When you are ready to eat a frozen bun, let it thaw at room temperature. To restore that “just-baked” texture, wrap the bun in a damp paper towel and microwave for 10-15 seconds, or toast it lightly on the grill alongside your hot dogs. Avoiding the refrigerator is key, as it can cause the starch to recrystallize and make the bread go stale faster.
Backyard Pairings: Completing Your Gourmet Spread
While these buns are the hero of the plate, no barbecue is complete without the perfect supporting cast. If you want to lean into the classic cookout vibe, pair these dogs with a Classic Smash Burger for the ultimate meat-lover’s platter.
For something refreshing to cut through the richness of the yeast bun, a vibrant Mexican Street Corn Salad or a bowl of Cowboy Caviar (coming soon) adds a wonderful crunch and acidity. If you’re looking for a pasta-based side, our High-Protein Italian Pasta Salad offers a zesty contrast that complements the sweet relish and mustard perfectly.
Frequently Asked Questions
Absolutely. You can bake them a day in advance and store them in an airtight container. Alternatively, you can shape the buns, place them on the baking sheet, and let them rise slowly in the refrigerator overnight for a fresh bake the next morning.
Yes, this recipe is designed for active dry yeast. Ensure you ‘bloom’ it in warm milk (105°F) for 5-10 minutes until foamy to confirm it is active before mixing the dough.
The secret is the egg wash. By whisking one large egg with a teaspoon of water and brushing it thinly over the dough before baking, you achieve a beautiful golden-brown color without the high-gloss sheen of a heavy butter wash.
Ensure your grill is preheated to high heat (at least 450°F). Pat the hot dogs dry before grilling and avoid moving them for the first 2-3 minutes to allow the char to develop.
Density usually comes from over-flouring the dough or under-proofing. Ensure you use a scale to measure 435g of flour and allow the buns to rise until they are noticeably puffy and light before putting them in the oven.
The Ultimate Recipe for Homemade Hot Dog Buns
Homemade Hot Dog Buns: The Ultimate Pillowy Yeast Roll Recipe
Ingredients
Equipment
Method
- Combine warm milk, sugar, and yeast. Let sit for 5-10 minutes until foamy.
- In a stand mixer, combine yeast mixture, egg, and flour. Gradually add softened butter while kneading for 7-10 minutes until smooth and elastic.
- Place dough in a greased bowl, cover, and let rise in a warm spot for 60-90 minutes until doubled.
- Divide dough into 8 pieces (90g each). Roll into 6-inch cylinders and place on a baking sheet 1/2 inch apart.
- Cover and let rise for 45-60 minutes until puffy.
- Brush with egg wash and bake at 375°F (190°C) for 15-18 minutes until golden-brown.
- Grill beef hot dogs over high heat until dark char marks appear.
- Place dog in sliced bun, add a zigzag of mustard, neon relish, and diced onions.
Notes
Soak onions in ice water to remove their harsh bite.
Bring the Ballpark Home Today
Mastering the Homemade Hot Dog Buns recipe is about more than just bread; it’s about creating a foundation for memories. From the soft, matte-finished crust to the perfectly charred beef interior, every element of this dish is designed to impress. We hope this guide helps you achieve that picture-perfect result you’ve been dreaming of.
Did your buns turn out pillowy and golden? We want to hear about it! Leave a comment below and tell us about your favorite toppings. Don’t forget to share your creations with us on Pinterest and subscribe to our newsletter for more deep-dives into culinary excellence.